Local amounts
This Local Amounts entry page is where you select the input form or template you need to enter local amounts (statutory figures). The local amounts are entered in the data entry standard form or in an advanced input form that is displayed after you have selected a form.
To access the Local Amounts page, click  Data Entry > Data Entry > Local Amounts tab.
On this page, you can:
Page layout
The page is divided into two sections. The top section is for selecting the company and account you want to work on. The bottom section is the data entry table where you enter local amounts for the selected account.
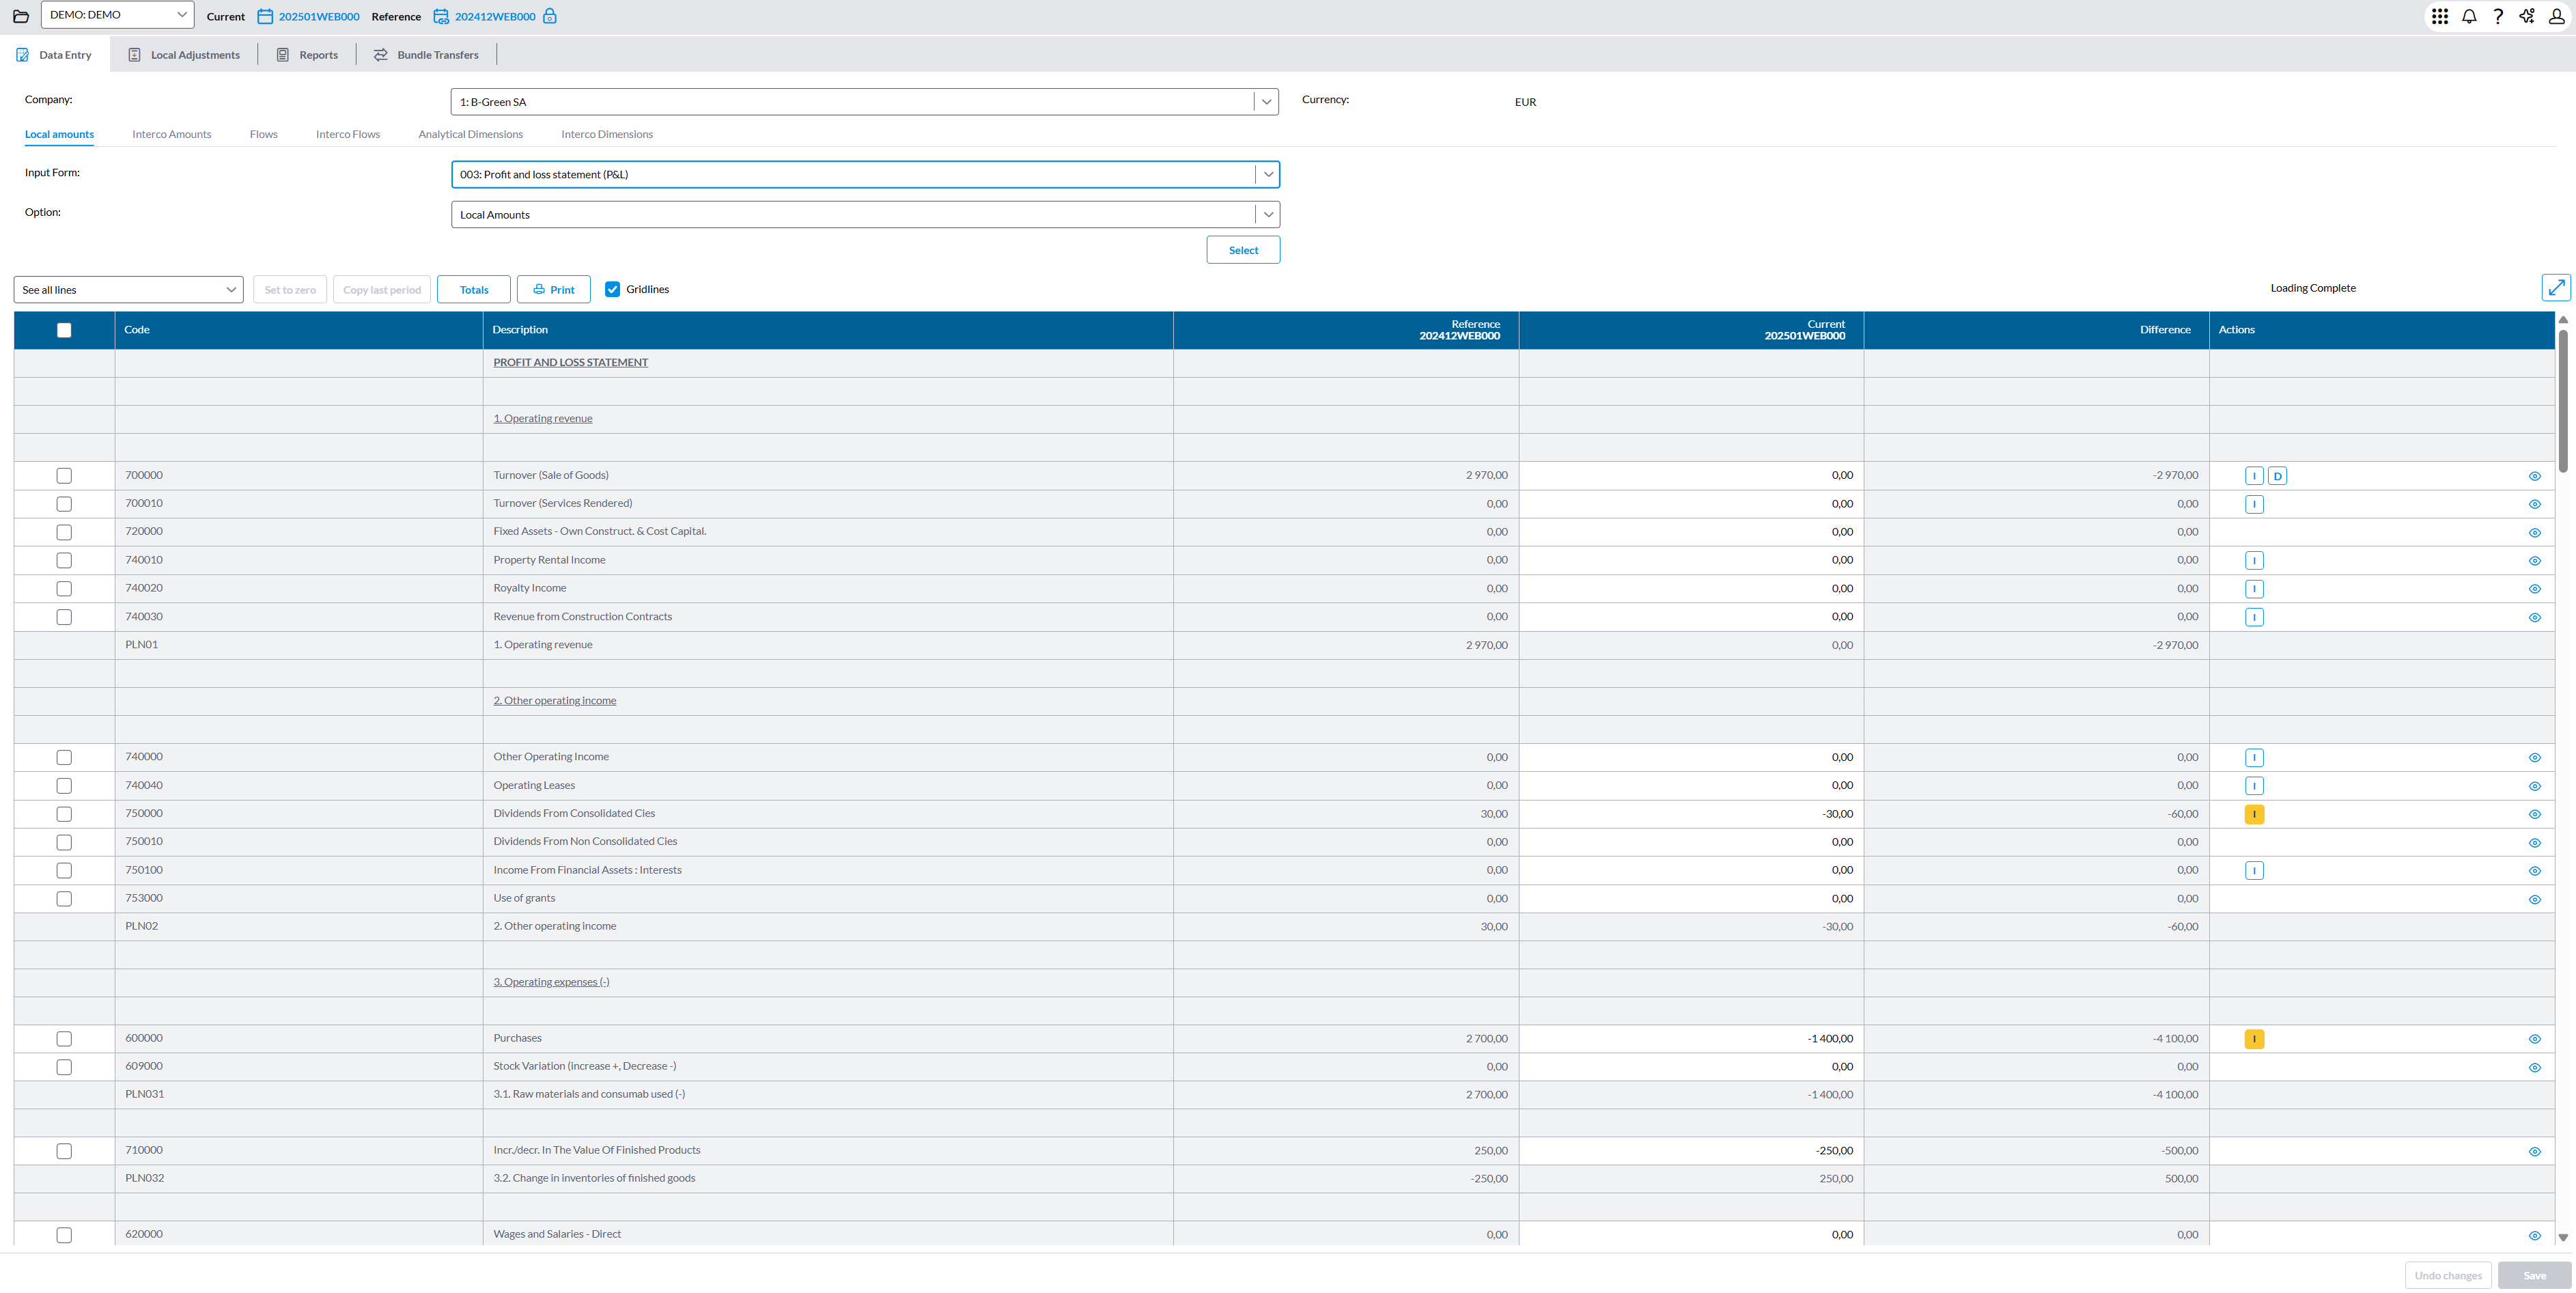
Top section
Company: Drop-down list of companies available to you to work on.
Input Form: Drop-down list of the available forms for data entry.
Note: The input form you select determines the options displayed in the Option field.
To enter local amounts, select one of the following:
-
Balance Sheet Input
-
Balance Sheet
-
Profit and Loss
Option: Drop-down list of the layout options for data entry in the form.
Note: The options available in this field are determined by the input form you select
These options include:
-
Local Amounts - allows you to enter the local amounts including the Reference and the Current amounts, and the difference between both.
Note: This is the only option that allows you to enter data. The other options present data for view only.
- Local Adjustments - shows you the impact of the Local Adjustments including the Reference and the Current amounts, and the difference between both.
- Adjusted Bundles - shows you the local amounts, corrected with the local adjustments including the Reference and the Current amounts, and the difference between both.
- Local + Adjustments N - shows you the local amounts, the local adjustments, and the local adjusted amounts. Only the Current amount is displayed.
- Local + Adjustments N-1 - shows you the local amounts, the local adjustments, and the local adjusted amounts. Only the Reference amount is displayed.
 - Displays the form details for the selected option:
-
If the Option selected is one of Local Amounts, Bundles, or Adjustments, opens the data entry standard form for you to enter the local amounts.
-
If the Option selected is Advanced input form, opens the a bundlespread form.
Additional functions
-
See all lines : a drop-down list of line filter options to display data.
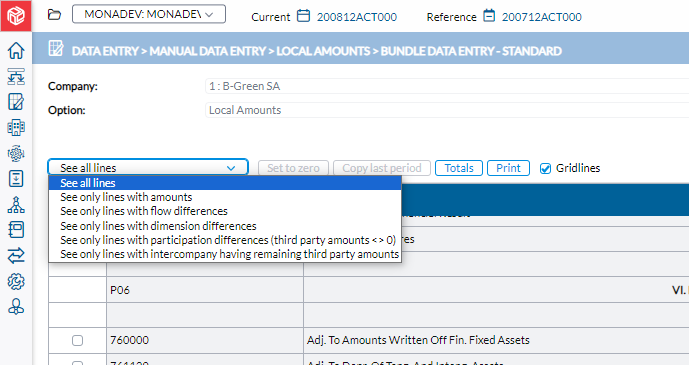
-
 - replaces all selected values with zero. This button works only in combination with the check boxes in the first column. This allows you to set to zero one or more (or all) accounts within the form.
-
 - works only in combination with the check boxes in the first column. It copies the selected amounts of the reference consolidation period into the current consolidation period. It allows you to copy one or more (or all) accounts within the form.
Note: While there is NO warning after you click this button, you need to confirm this modification by clicking the Update button.
-
 - opens a dialog showing you the total debit and credit for the Balance Sheet, the Profit and Loss and the Contingencies accounts, as well as the result of the year in the Balance Sheet and the Profit and Loss.
 -
 - allows you to print the information on the page.
 -
 - a toggle that adds Excel-like grid lines to the displayed data on the page when selected.
 -
 - Opens the panel in full screen.
 -
 - reverses all modifications since the last time you saved the information. A message will ask you to confirm the cancellation of the modifications.
Data table
The data area contains the accounts that are available on the Input Form:
| Column | Description |
|---|---|
| Code | Account code. |
| Description | Account description. |
| Reference | Amount from the reference period. |
| Current | Amount from the current period. |
| Difference | Calculated difference between the reference amount displayed and the current amount entered. |
Actions column
Click any of the following icons to perform the associated actions. Icons only appear on accounts where that specific data applies.
For example,  appears only accounts that are defined to work with flows.
| Icon | Opens a page to ... |
|---|---|

|
enter Intercompany transactions. |
|
|
enter Flow data. |
 |
enter Participations data. |
 |
enter Partner information. |
 |
enter Dimension information. |
 |
view import details. |
|
Note: For any of the above, where there are differences to justify, the icon is highlighted with a yellow background. For example, this |
 means that there are outstanding differences waiting to be justified in the dimension.
Enter local amounts
-
Select the Company and Account. See the top section
-
For Option, select Local Amounts
-
Click
. The standard data entry form for local amount details is displayed. It displays the list of accounts that have been added to the standard form for the selected company and available in the database. So, you can get a page with some data (if data was already filled in or imported) or a page with zero in all the lines (if there is no data available for selected company and included accounts). -
Enter amounts in their respective fields.
-
Optionally, use the additional functions available on the page to do your work.
-
If applicable, click on any icon in the Actions column to enter required data.
-
Save your input.
Change an amount
Note: You can only change the amounts when the form is accessed with the Local Amounts option selected.
- Put your the cursor on the amount you want to change.
- Change the amount. Border appears around all the subtotal and total amounts impacted by this change.
- Save the change.
Enter partner detail
The button appears on accounts defined to work with partner information such as intercompany accounts, participation accounts, or partner accounts. Click to open the Partners page and enter the partner company details.
Enter flow data
The button is available on the page if the account whose data you want enter is defined to have flows (i.e. Balance Sheet accounts). Click to open the Flows page and enter the flow data. Flow data can be Cash (C) and Non-Cash (NC).
Copy data from the reference consolidation period
-
Do one of the following:
-
To copy all the lines, select the checkbox at the top left of the data area. All lines from the report will be selected.
-
To copy a line or a few lines, select only one or a few lines.
-
-
Click
to transfer the amounts from reference to current period. All totals and subtotals of the selected lines will get borders around them. -
Confirm the update of the amounts.
Review adjusted amounts
On this page, in addition to selecting the parameters for local amount entry, you can also review adjusted amounts.
You can:
-
Review the adjusted amounts for both the current and reference period.
-
View the impact of the local adjustments on the bundle amounts for the current consolidation.
Review the adjusted amounts for both the current and reference periods
-
Select a company.
-
Select the applicable input form.
-
Select Adjusted Bundles from the Option field.
-
Click
. The adjusted amounts for both the current and reference periods are displayed for you to review.
View the impact of the local adjustments on the bundle amounts for the current consolidation
-
Select a company.
-
Select the applicable input form.
-
Select Adjusted Bundles from the Option field.
-
Click
. Details of the selected form is displayed. -
Select a row and click
to view the import data details. -
Optionally click the Export icon to export the data to Excel.