Local adjustments
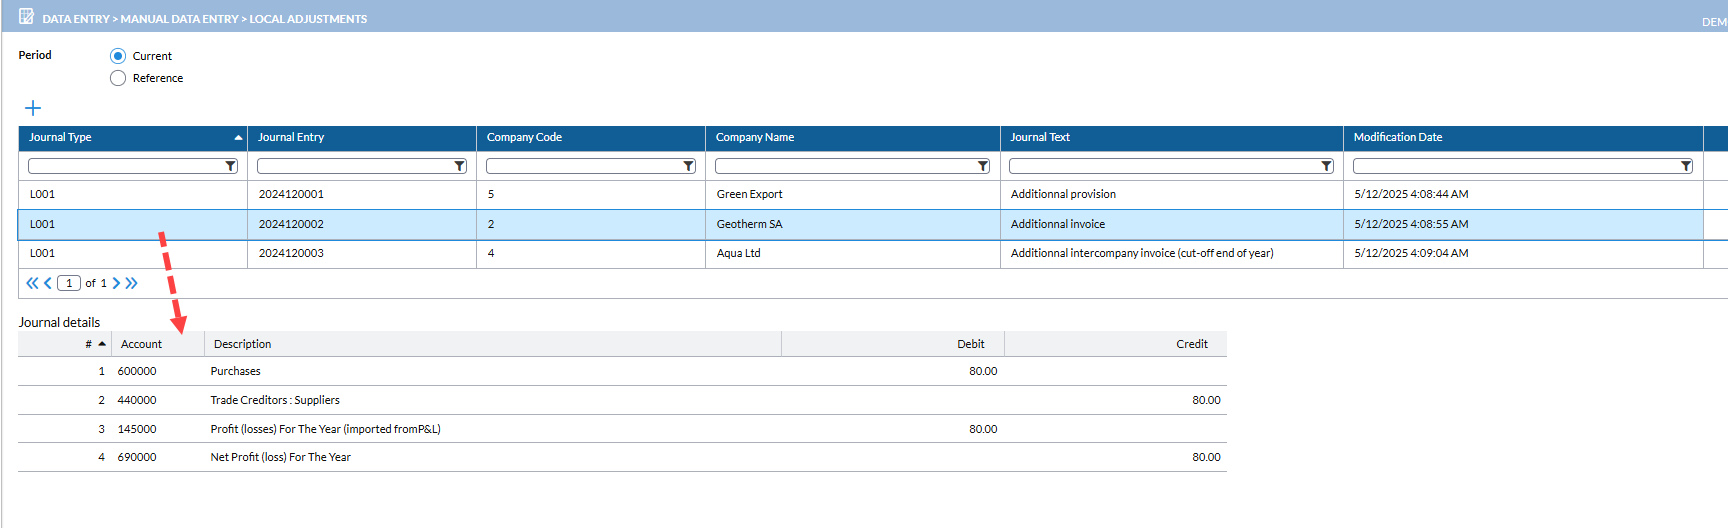
The Local Adjustments page displays the journal entries available in the consolidation. Use this page to view, add, and manage local adjustments by company.
To access the Local Adjustments > Local Adjustments.

Main page layout
Top panel
The top panel lists all local adjustments available in the consolidation. Use the Period options to filter the list by Current or Reference period.
Each row displays the following information:
Journal Type — The type and category of the local adjustment.
Journal Entry — The entry number of the local adjustment.
Company Code — The key of the company for which the local adjustment is made.
Company Name — The name of the company for which the local adjustment is made.
Journal Text — A description of the local adjustment.
Modification Date — The date the local adjustment was last modified.
Actions column
Two icons are available for each row:
| Icon | Description |
|---|---|
|
|
View. Opens the selected local adjustment for you to view, and adjust, if required. |
 |
Delete. Deletes the local adjustment. You must confirm before deletion is completed. |
Additional functions
-
 — Opens a page to add journals.
-
 — Shows or hides specific columns in the table.
Column filter selections are saved using browser cookies, allowing you to move between pages without losing your selected filters. However, clearing your browser cookies resets the column filters to the default selection.
Journal details
The lower panel (data table) of the page is where the details of any adjustment selected on the top panel are displayed.
- Line — Line number of the adjustment.
-
Account — Account code and the account description. You can use the
 to search for an account. The code and description of the account you select are populated in their respective fields.
- Debit — Total of debit amounts automatically calculated.
-
Credit — Total of credit amounts automatically calculated.
Preview journal details
In the Adjustments table, click on an adjustment. Details of the adjustment are displayed in Journal details.
To view the full details, see View full journal details.
View full journal details
To view the full details of an adjustment, click in the Actions column of the main Local Adjustments page.
For the description of the general adjustment details, see Top section. For the journal details, see Data table.
Modify an adjustment
-
Click
in the Actions column of the main Local Adjustments page. The adjustment details are displayed. -
Make the changes and save your work.
Add a new journal
The Add Journal view allows you to enter adjustments manually. To import adjustments, see Import Adjustments. To access this page, click on the main Local Adjustments page.

The page is divided into two sections: a top section for general adjustment information and a data area for line details.
Top section — Add new journal page
The top section of the page is where you enter general adjustment-related information.
-
Company — Company code and name.
-
Journal — Journal code and name.
-
Associated Journal — Journal into which the adjustment will be carried forward.
-
Journal Entry — Number assigned automatically by the system to the adjustment. You can change this number if needed.
-
Behavior — The action taken when a new period is created in a new year — for example, carry forward to reserve, copy, or reverse. Select an option from the drop-down list.
-
Attachment — Upload and attach a supporting document using the upload icon..
-
Created — Date the adjustment record was created. Populated by the system after you save
-
Modified — Date the adjustment record was last modified. Populated by the system after you save.
-
By — Name of the person who created the adjustment. Populated by the system after you save.
Data table
The data table is where you enter the line details of the adjustment.
-
When you select an existing adjustment, the lines in the data area are populated by the system.
-
When you start a new adjustment, empty lines are displayed. Select the applicable Account and enter the details for each line.
Each column has a filter field below the header. You can use the wildcard characters * and ? to perform searches within any column filter.
| Column | Description |
|---|---|
| Line | Line number of the adjustment.Account |
| Account | Account code and the account description. |
| Debit | Total of debit amounts automatically calculated. |
| Credit | Total of credit amounts automatically calculated. |
Actions column
| Icon | Description |
|---|---|
 |
|
 |
Difference. Allocates the remaining amount to a partner without manual entry. |
| |
Clears the content of the selected row. |
Additional functions
-
 — Opens the View by Account pop-up, which displays Debit /Credit sums by account.
  — Opens the Multiply /Divide pop-up, allowing you to divide or multiply the selected amounts.
 — Adds a new set of rows below the existing rows in the data area.
 — Takes you back to the previous page. Clicking this button without saving discards all unsaved changes.
 — Reverses all values entered since the last save. Use this button after saving to restore the table to its previous state.
To add a new journal
-
Click
. The input page opens. -
In the top section of the page, enter the adjustment details. See Top section- Add new journal.
-
Use the additional functions as needed.
-
In the data area, select the applicable Account and enter the line details.
-
Use the Actions as needed.
-
Save the journal.
After saving, the following options are available:
-
 — Start a new blank adjustment.
 -
 — Start a new adjustment by copying the layout of the current adjustment. Everything is copied except for the adjustment description and the amount of each adjustment line.
 -
 — Delete a selected journal.
 -
 — Select a format and click to download report.
-
Multiply/Divide an adjustment
The Multiply / Divide button is very useful during a monthly reporting. You can easily recalculate a provision, depreciation, etc. to the Year-To-Date value.
Note: The Multiply / Divide button will work on all the lines that you select.
-
Select adjustment lines.
-
Click
. The Mulitply/Divide pop-up appears.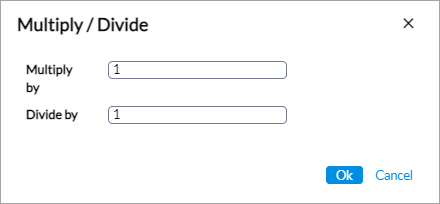
-
Enter the fraction by which you want to multiply or divide.
-
Click
 . The amounts are recalculated.
Repeat an amount
Using the Repeat function you can change all the amounts of an
adjustment.
-
Enter the amount you want to repeat on any line.
-
Select the amount and then, click
to copy the amount to the other lines. The new amounts will alternate between debit and credit. Note: When using this option, it is recommended to enter the accounts in such an order that the amounts can alternate properly between debit and credit.