Define a new consolidation period
The Define Periods page enables you to perform various actions such as creating new periods, modifying existing ones, or removing them altogether. Additionally, you have the option to lock periods for different purposes, including marking the close of a financial consolidation.
Each period encompasses all dimensions, including companies, accounts, flows, amounts, analytical information, journals, account summations, reports, input screens, and more. Consequently, when you generate a new period using an existing one as a reference, all the structures from the chosen reference period will be replicated within the newly created period.
To access the Define Periods page, click  Group > Periods > Define Periods.
Note: Before creating a period, ensure that the reference period you want to use is a Consolidated period. See Consolidation Statusboard.
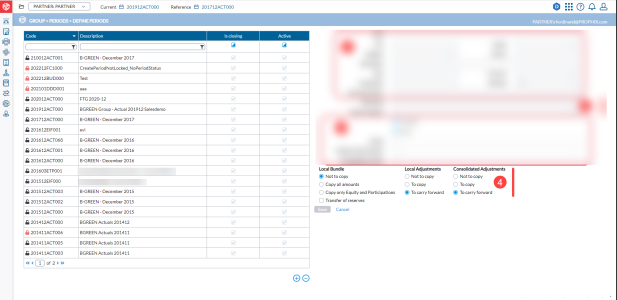
The left-side panel displays a list of existing consolidation periods includes:
-
Code - period code
-
Description - name of period
-
Is Closing - status indicator to show that period is closing or not.
-
Active (period is active) for each period. When you select a consolidation period from the list, the parameters are displayed in the right-side panel, and you can edit the period’s definition.
Note: You can filter the consolidation periods list by Code, Description, and status — Active or Inactive periods. You can also use wildcards to filter this list.
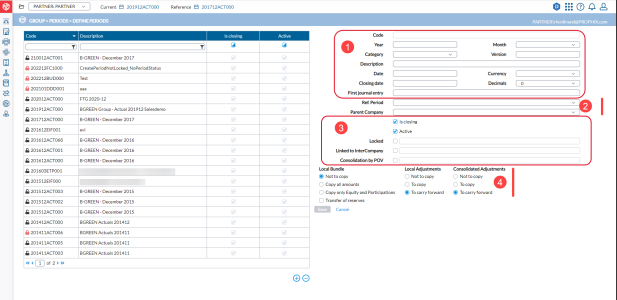
The right-side panel of the page is used for defining the consolidation period. It is divided into four sections:
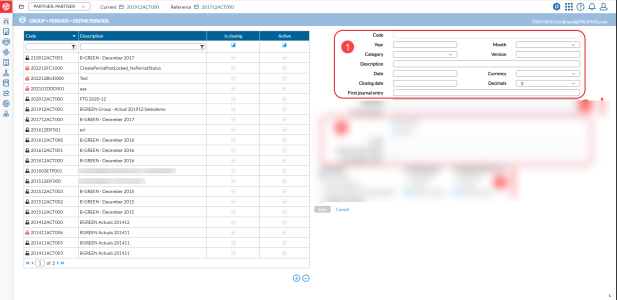
The first section is used to define the time and describe the consolidation period.
It includes the following information:
- Code: displays the code of the period selected in the left-side panel.
- Year - year period is created.
- Month - month period is created.
- Category - data category.
- Version - version number of the consolidation period.
- Name - description of the consolidation period.
- Date - start date.
- Closing date - date by which the figures must be confirmed and validated for the period. After this date, the period is closed and modifications can no longer be made. The actual closing of the period occurs by running a scheduled Close Period job (see Job Schedules) that will close all tasks where the current date falls after the specified Closing date.
- Currency - group currency.
- Decimals - number of decimals.
- First journal entry - the first number used for Journal Entries. This number will be incremented for all adjustments, regardless of the journal in which they are made. This allows you to refer to an adjustment by the adjustment number only. For example, 2022001 and all the journals will follow this structure: 2022001, 2022002, etc.
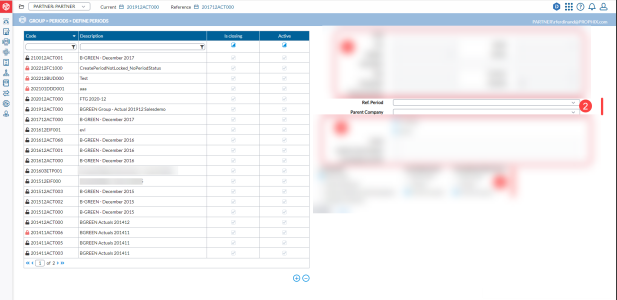
The second section is used to define the relationship with the reference consolidation period when you create a new consolidation period.
- Reference Period - the consolidation period from which structures and previous figures will be copied into the new consolidation period.
- Parent Company - the parent company that will be used in the new consolidation period.
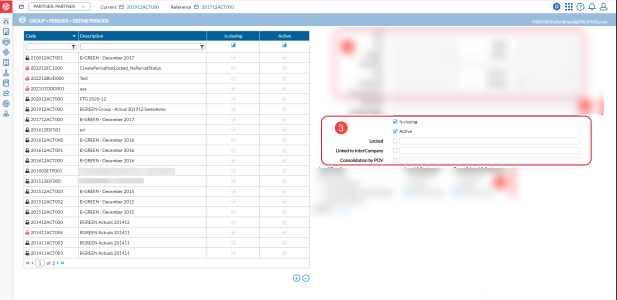
The third section is used to define different statuses of the consolidation period.
-
Is closing - if selected, enables and displays a consolidation period in the list of Reference Periods that can be selected in the left-side panel.
-
Active - if selected, activates a consolidation period, making the period available for every user. An inactive period will not be available for review but can be reactivated by selecting this option.
-
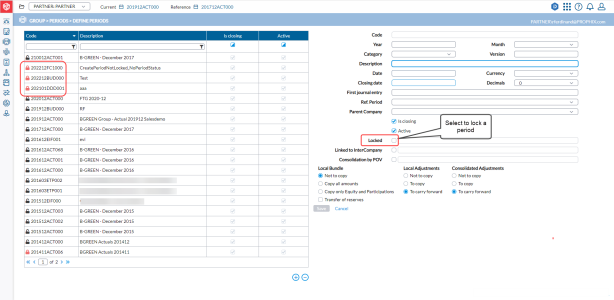
Locked - locks the consolidation period. A locked period is available for review only, no data can be modified. A locked period has a lock symbol beside it. You can enter a remark as explanation when locking a period.
- Linked to Intercompany - allows a consolidation period to be linked to a period in Intercompany. If the period codes differ, it will be indicated in the field next to the checkbox.
- Consolidation by POV - allows some journal eliminations to be done according to the group structure (a criteria such as participation) created as a Point of View.
The fourth section is used to create a new consolidation period. It defines how the Adjustments will behave while creating a new consolidation period.
- Local Bundle - Here, you can select one of the following:
- Not to copy the bundle data.
- Copy all bundle data.
- Copy only Equity and Participation data.
- Transfer of reserves
- Local Adjustments - Here, you can select one of the following:
- Not to copy any Local Adjustments.
- To copy the Local Adjustments.
- To carry forward the Local Adjustments.
- Consolidated Adjustments - Here you can decide:
- Not to copy any Consolidation Adjustments.
- To copy the Consolidation Adjustments.
- To carry forward the Consolidation Adjustments.
Create a new consolidation period based on the last month of the previous year
When you create a new consolidation period based on the Last consolidation period of previous year, the adjustments are carried forward, and not copied.
- Click
 . The fields in the right pane are cleared and ready for your input.
 - Enter all the required information to define the consolidation period.
- Select the Ref Period. The Parent Company is copied across automatically when you select a Reference consolidation period.
- In the Parent Company field, leave the copied company information as is.
- By default, the status of the consolidation period will be
 . If you are not yet ready to activate the new consolidation period, you can clear the checkbox.
 - If the period is locked (Locked checkbox is selected), clear the checkbox to unlock it, and optionally, enter some comments.
- In the Intercompany field, if you want to link the consolidation period to a period in Intercompany, select this option and optionally, enter some comments. Otherwise, leave as is.
- In the Consolidation by POV (Point of View) field, if you want some journal eliminations to be done according to the group structure created as a Point of View, select this option. Otherwise, leave as is.
- For Local Bundle (statutory figures), leave the default selection of
 because you are opening a new consolidation period based on the last period of the previous year, you don’t want to copy the Local Bundle amounts. Instead, you need to carry forward the Local and Consolidation Adjustments.
 - For Local Adjustments, leave the default selection of
 so as to carry forward the Local Adjustments. Do not select the other options.
 - For Consolidation Adjustments, leave the default selection of
 so as to carry forward the Local Consolidation Adjustments.
 - Click
 . The new consolidation period you just added appears on the list of consolidation periods on the left.
Create a new consolidation period based on the previous period of the same year
When you create a new consolidation period based on the previous period of the same year, you can copy the adjustments to avoid having to enter them again.
- Click
 . The fields in the right pane are cleared and ready for your input.
 - Enter all the required information to define the consolidation period.
- Select the Ref Period. The Parent Company is copied across automatically when you select a Reference consolidation period.
- In the Parent Company field, leave the copied company information as is.
- By default, the status of the consolidation period will be
 . If you are not yet ready to activate the new consolidation period, you can clear the checkbox.
 - If the period is locked (Locked check mark is selected), click to unlock it, and optionally, enter some comments.
- In the Intercompany field, if you want to link the consolidation period to a period in Intercompany, select this option and optionally, enter some comments. Otherwise, leave as is.
- In the Consolidation by POV (Point of View) field, if you want some journal eliminations to be done according to the group structure created as a Point of View, select this option. Otherwise, leave as is.
- For Local Bundle (statutory figures), leave the default selection of
 .
. - For Local Adjustments, select
 so as to copy the Local Adjustments (so you don't have to enter them again).
 - For Consolidation Adjustments, select
 so as to copy the Consolidation Adjustments (so you don't have to enter them again).
 - Click
 . The new consolidation period you just added appears on the list of consolidation periods in the left-side panel.
Lock a period
You may want to lock a period for several reasons, for example, to close a financial consolidation. When a period is locked, users are no longer able to enter new entries or make modifications to it. A locked period is available in read-only mode, and identifiable by this icon:  .
.
-
To lock a period, on the left-side panel of the Define Periods page, select the period you want to lock.
-
Select Locked to lock the period, and in text field, enter the reason why you are locking the period.
-
Click
 .
.
Delete a consolidation period
-
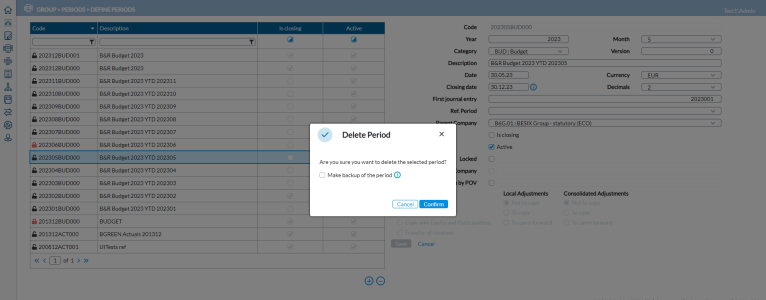
To delete a period, on the left-side panel of the Define Periods page, select the period you want to delete.
-
Click
 . The Delete Period dialog is displayed.
 -
Optionally, to create a backup of the consolidation period before deleting it, select Make backup of the period. A notification is displayed after a backup of the period is created.
-
Click
 to delete the selected period.
 Note: If you made a backup of the period before deleting it, it is backed up and stored in a temporary folder on the server. To retrieve the file and download on your computer, go to the Backup/Restore Periods page , and on the Restore tab, select the file from the File drop-down list and then, click Download File For more information , see the Restore a period section of the Back up and restore periods article.
