Chart of Accounts
The Chart of Accounts page is for adding all the accounts that your business uses to record its financial transactions. Each account represents a different type of asset, liability, revenue, expense, or equity, and is assigned a unique number or code for easy identification.
To access the Chart of Accounts page, click  Configuration > System Structures > Accounts > Chart of Accounts.

On the Chart of Accounts page, you can:
Chart of Accounts tab
The Chart of Accounts tab is the default tab on this page. The left-side panel lists all the available accounts.
You can filter the account(s) that you want to display in this panel by:
-
Code - code identifying the account.
-
Description - description of the account. You have the option to review the language descriptions of an account code. See Translate account description.
- Account Type - type of account (Balance Sheet, P&L, Contingencies, Quantities, Others).
- Debit/Credit Type - debit or credit account.
Note: Use the filters on the top of the page first if you are not familiar with the account codes to display a pop-up page listing all the existing accounts. Alternatively, you can type the account codes with or without wildcards in the Code field.
The right-side panel is where you can define a new account or view and modify the parameters of the existing accounts. This section includes the Code and Description and these three group boxes:
The Code is the Account Number, a maximum of 12 alphanumeric characters and Description, max 50 alphanumeric characters.
Note: You cannot modify an existing account code on this page. To make a change, contact your system administrator.
Options
| Account Type |
This is where you define the following account types. Select an account type from the drop-down list.
|
| Account Class | This is where you specify a group or class of accounts (max 6 alphanumeric characters), which is essential for the flow assignment in the later part. Any account type using flows will need to be grouped under an Account Class (mainly Balance Sheet accounts). This is because the assignment of flows to accounts will be carried out on the basis of Account Class. See Accounts x Flows. |
| (Input) Sign |
This is the sign for the input: +: The input amounts will be treated as it is. For example, if you enter (+) amount, it will be stored as (+). If you enter (–) amount, it will be stored as (–). - : The input amounts will be negated from its original sign. For example: If you enter (+) amount, it will be stored as (–). If you enter (–) amount, it will be stored as (+). Note: The input sign is linked to the Debit/Credit Type of the account. For instance, if you have the combination of “Debit/+”, it means that you will enter a positive amount on this account if you have to book a debit, and a negative amount if you have to book a credit. |
| Default Sign |
This is the sign you expect to get for the closing balance of the account (by default). For instance, the Accumulated Depreciation account is typically defined as “Debit/+/-” for the Account Type/Input Sign/Default Sign combination. This means that the Accumulated Depreciation, although listed as Debit type, is expected to result in negative figure at the closing balance. Note: The default sign will have no effect on the figures displayed or stored. It serves mainly as a checkpoint on which you can base your validation rules. If no default sign is expected, use ?. |
| Partners |
This is where you specify the type of partner information needed for certain accounts. There are several partner types:
|
| Account with Flows |
This is where you specify the type of flows needed for certain accounts:
|
Conversions
This is where you define currency-related conversions.
| Historical Rate 1 and 2 |
If selected, indicates that historical rates apply to the selected account (mainly equity and participation accounts). It indicates that the historical rate associated with certain flows or movements of this account will prevail during the currency conversion of the account. |
Additional Parameters
This is where you define additional parameters for certain accounts.
| Account dimensions |
If selected, allows the use of dimensions on the selected account. See Analytical Dimensions. |
| Account for consolidation use only | If selected, the selected account is used for consolidation purpose only (e.g. technical accounts to book eliminations) or at consolidated level (e.g. Consolidated Reserves or Minority Interests account). |
| Account for cash flows | If selected, the selected account will be used in the Cash Flow Statement. See User Defined Reports. |
|
Note: The settings for the next three parameters are critical as they are the triggers for the booking of automatic eliminations. |
|
| Split account between Group and 3rd Parties |
If selected, the selected account will be taken into account in the calculation of minority interests (mainly for equity and participation accounts). |
| Calculate consolidation difference | If selected, the selected account will be taken into account in the calculation of consolidation difference (mainly for equity and participation accounts). |
| Include account for equity calculation | If selected, the selected account will be taken into account in the calculation of equity value (mainly for equity and participation accounts). This option will be mainly for the entities treated with equity consolidation method. |
| Do not carry forward |
This option should not be selected except for some special accounts that should not be carried forward when used in journal adjustment (like quantities). Note: Incorrect use of this option may end up in unbalanced entries. |
On the Chart of Accounts tab, you can:
Add an account
Tip: You have the options to create a new account from scratch or copy an existing one to create your account.
-
Click
 .
. -
Enter the account Code and Description.
-
In the Options section or group box, enter the information required in all the fields. If applicable, select the Partner type, and select the Accounts with flows type.
- In the Conversions group box, select the applicable options for Historical Rate, if needed, and enter the rate Type 1 and 2.
- In the Additional Parameters group box, do not forget to do the following where applicable:
- For Equity and Participation accounts, select Split account between Group and 3rd Parties, Calculate consolidation difference, and Include account for equity calculation.
For Account dimensions, select if dimensions will be used on the account.
For Accounts for consolidation, select only if the account will be used at consolidation level.
For Accounts for cash flows, select if the account will be used in the cash flow statement.
-
Click
 to save your new account.
 -
You have these options:
-
 - opens the Specific Accounts page displaying a list of system
accounts which are necessary for Financial Consolidation to carry out the consolidation and to book the related entries.
Specific accounts are represented by system generated codes along with the
description, which you have to assign to the corresponding group chart of
accounts.
- opens the Specific Accounts page displaying a list of system
accounts which are necessary for Financial Consolidation to carry out the consolidation and to book the related entries.
Specific accounts are represented by system generated codes along with the
description, which you have to assign to the corresponding group chart of
accounts. -
 - opens the Participation
Account page where you can define the “non-
consolidated” participation /shareholding accounts associated with the
“consolidated” shareholding accounts. This is useful for Financial Consolidation especially during the sub group generation process where some
consolidated shareholdings should be reclassified as the non-consolidated
shareholdings.
- opens the Participation
Account page where you can define the “non-
consolidated” participation /shareholding accounts associated with the
“consolidated” shareholding accounts. This is useful for Financial Consolidation especially during the sub group generation process where some
consolidated shareholdings should be reclassified as the non-consolidated
shareholdings. -
 - allows you to easily create a new account by
duplicating another account with similar parameters. See Duplicate an account.
- allows you to easily create a new account by
duplicating another account with similar parameters. See Duplicate an account.
-
Duplicate an account
When you duplicate an account, a new account is created based on the parameters of the currently selected account.
-
To duplicate an account, first select an account from the left-side panel and then, click
.
-
In the Account Duplication pop-up, enter a new account code in the New Code field.
-
Optionally, clear one or some of the default Options. You may leave all selected as is.
-
Click
. The account is duplicated with the new code and listed on the left-side panel.
Review translated account description
You can easily review the description of an account in the data language of your choice by using the ![]() button.
button.
-
Click the Chart of Accounts tab.
-
To review the existing translated description for a particular language, click
 . The Translate Item pop-up panel is displayed.
 -
If the language is not displayed on the list, select it from the drop-down list and click Add Language.
-
Click in the Description field of the selected language to review or modify the translated description.
-
Click
.
Delete accounts
-
You have these options:
-
To delete an account: select the account and then, click
 .
. -
To delete a few accounts: select the accounts and then click
-
To delete several accounts: click the check box next to Code at the top of the list. All the accounts on the page are selected. You can clear the check boxes for those accounts you do not want to delete. Click
to delete all the selected ones.
-
-
Confirm the deletion to delete the selected accounts.
Change an account code
The Change Account Codes page enables you to change or modify the existing account codes.
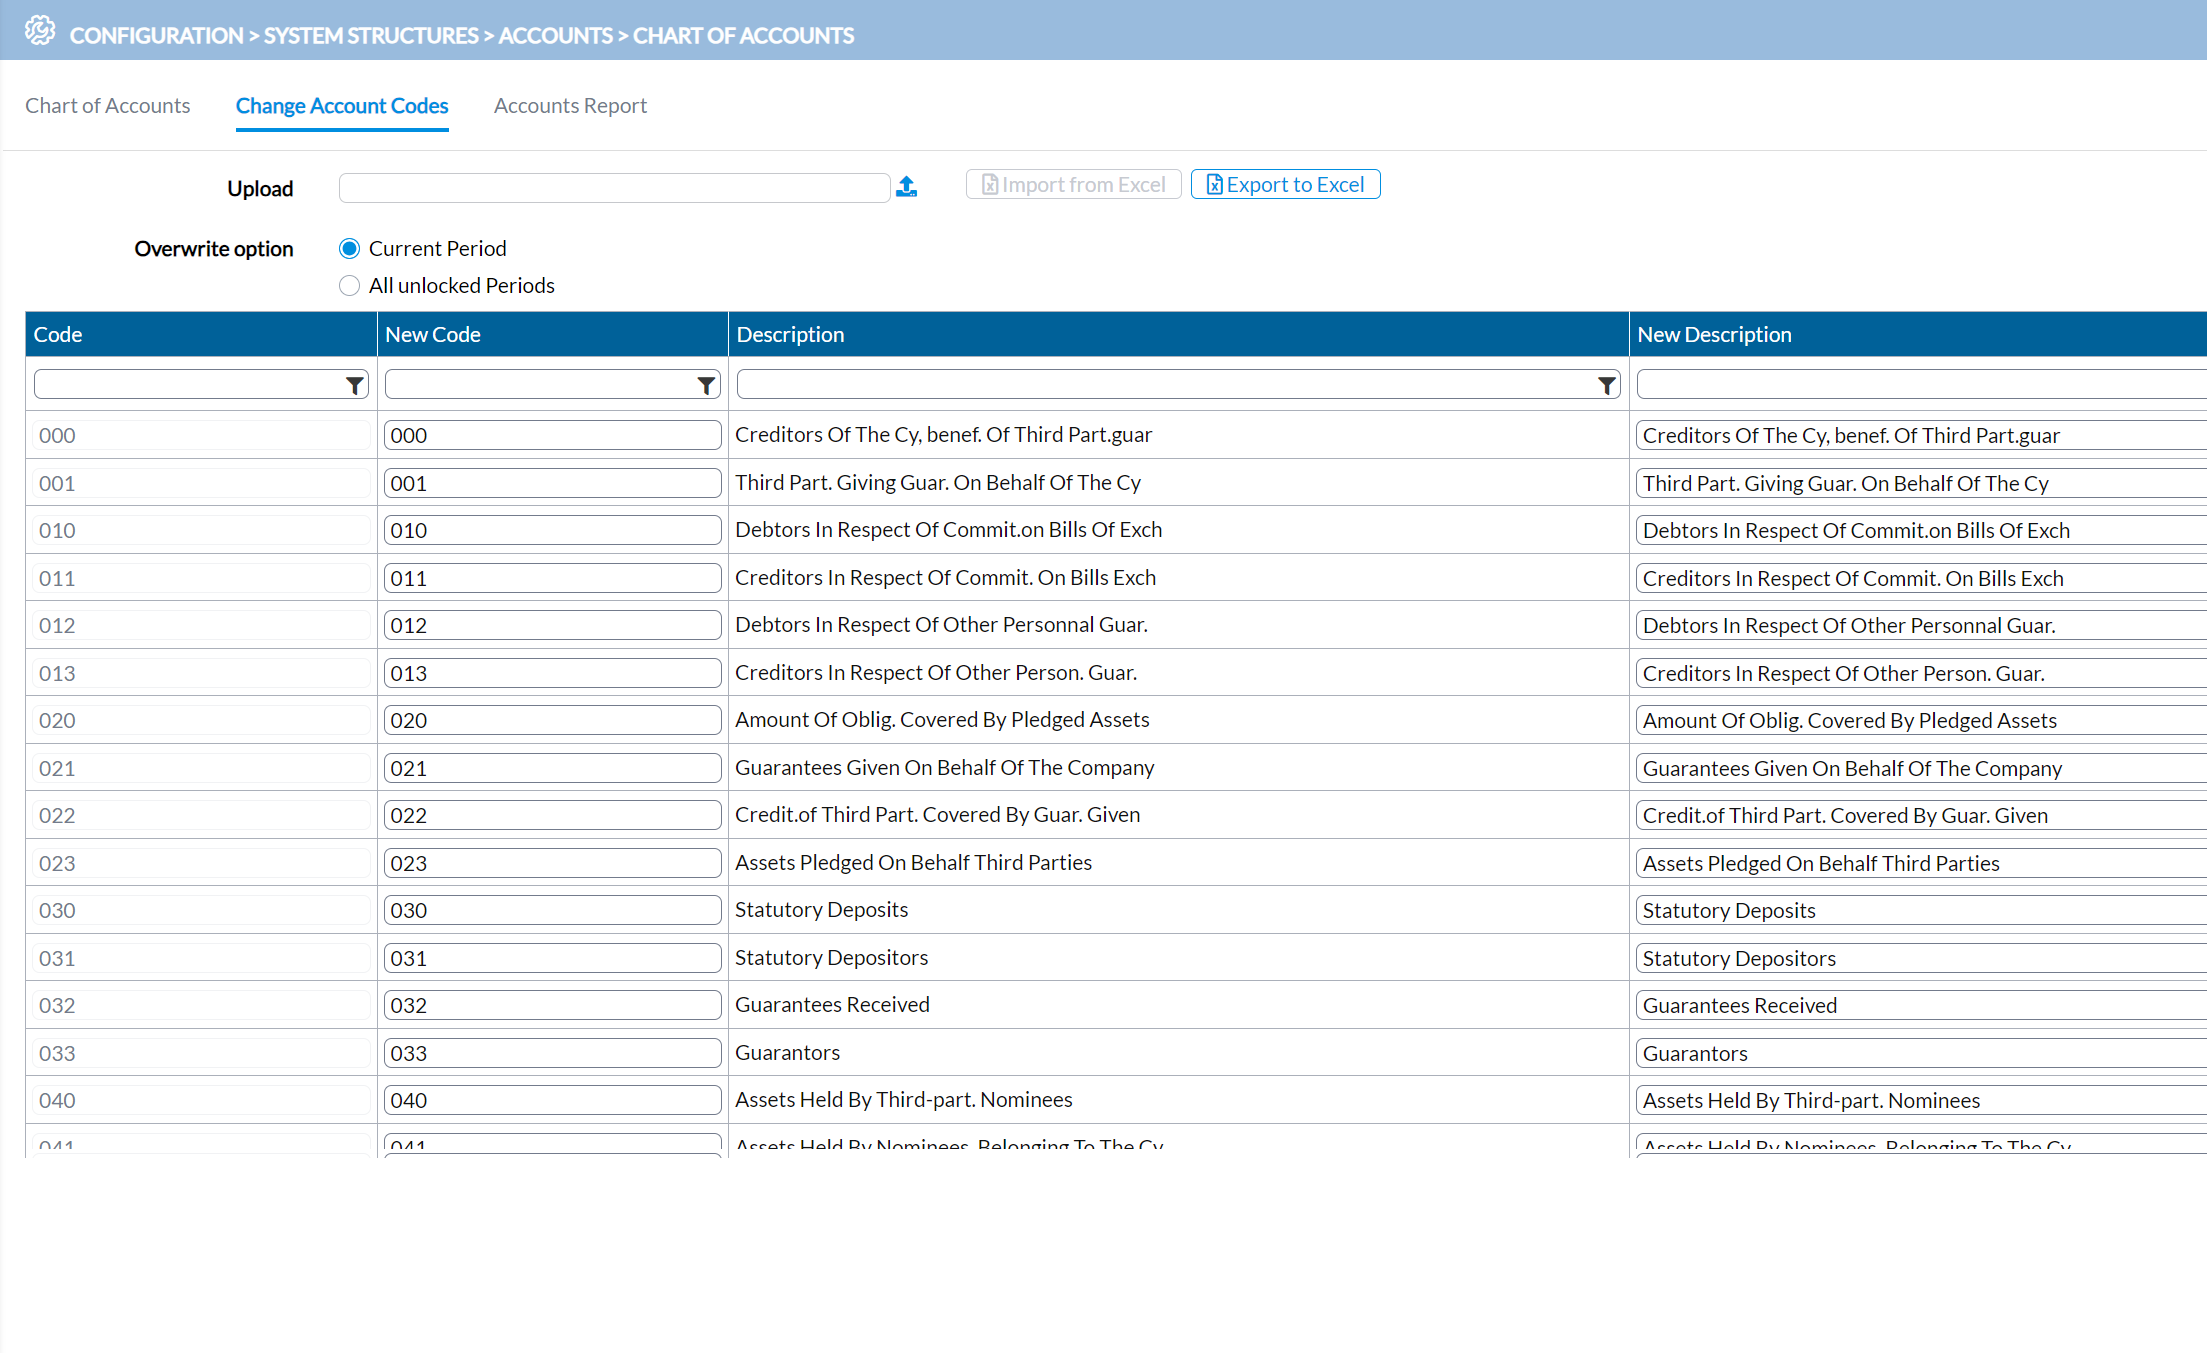
Caution: Be careful not to change the code of an account that was used in a previous period.
To change an account code:
-
Click the Change Account Codes tab.
Note:If you want to change more than a few account codes, then proceed to upload account codes. -
Look for the code you want to change.
You can use the Code, New Code, and Description filters to search for the account code.
-
Click in the New Code field, select the existing code, and type in a new code to replace it.
-
Optionally, update the description for New Code in the New Description field.
-
Click
.
Upload account codes
If you want to change more than a handful of codes, you can use the import process to upload the new codes. Only Excel (.XLS) files are supported at this time.
Caution: Ensure that you have a backup of your account codes before you proceed as this action will overwrite some codes. See Export account codes.
-
Click the Change Account Codes tab.
-
Click in the In the Upload field, click
 .
. -
Navigate to the file and select it. The file name appears in the in the Upload field.
Note: If the file is not the correct one, you can click to delete the file. Then, upload another one.
 -
Select an Overwrite Option:
-
Current Period: Only the codes in the current period will be overwritten by the codes in the import file.
-
All unlocked Periods: Codes in all unlocked periods will be overwritten.
-
-
Click
 . While importing the modified data, a preview table pops up showing the result of the import.
 -
Check the Errors and Warnings on the Import Validation Results. Compare the old and new Codes and Descriptions for accuracy. See sample import validation result:
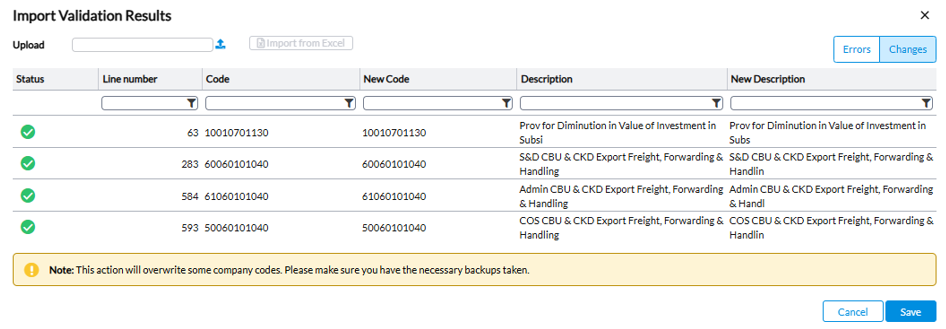
-
You have these options:
-
To accept the import, click
. -
To cancel the import, click

-
Export account codes
You can export the existing account codes, modify them in the exported file, and then import the modified file back into the application. It is also good practice to always a do a backup of your account codes before importing a file of modified codes.
-
Click the Change Account Codes tab.
-
Click
 .
. -
After the file is generated, a download link appears for you to use.
-
Click the download link and save the file.
Generate an account report
By default, the Accounts Report is run on the current period, but you can always
change the period. To select a different period, click  to search for and select a different period in the Select a period pop-up.
-
Click the Accounts Reports tab.
-
Choose one of these types of reports:
- Account definition.This is a complete report of the accounts along with their detail parameters defined in the Chart of Accounts page. Selecting this report type presents you with two options to further sort or filter the reports:
Sorting options - To sort the reports, you can use the Sorting options by account code, account name, or account class.
Filtering options - To filter the report, you can use the Filtering options based on the account type, account class, debit/credit type, and account code.
Note: For the account class and code, you can use wildcards to search. You can also click
to access a selection pop-up and select the exact account class and/or code.
-
Specific accounts. This is a report of all the specific accounts defined in the Chart of accounts – Specific Accounts page. See Specific Accounts menu.
-
Participation accounts. This is a report of all the participation accounts defined in the Chart of accounts – Participation Accounts page. See Participation Accounts menu.
- Account definition.This is a complete report of the accounts along with their detail parameters defined in the Chart of Accounts page. Selecting this report type presents you with two options to further sort or filter the reports:
- In the File type field, select the output format.
- Click
 to produce the report. After the report is generated, a download link appears below for you to click and view it in the file format selected.