Getting started
In this article, you will find information on navigating the Financial Consolidation interface. You will gain insights into the functions of frequently used buttons, explore the power of wildcards for filtering information, and learn how to effortlessly launch reports.
Aside from our help files, we offer courses designed to enhance your understanding of the fundamental functions, analysis, and reporting procedures involved in Financial Consolidation. You have the option to enroll in our self-paced course, Financial Consolidation: Getting Started. This course aims to provide a comprehensive introduction to the following topics:
-
Navigating the application interface and basic system functionality
-
Explaining the consolidation workflow process
-
Performing data entry both manually and by import /export
-
Accessing reports for data validation and reconciliation
Log in
Users can log in to Financial Consolidation using one these two options:
Use the Prophix One Portal
Starting with release 2024.4.0 new customers or deployments use a centralized Prophix One Portal for accessing their accounts. Upon logging in, and for the remainder of their session, users can access their Prophix applications and their instances without the need for separate logins.
To sign in, you need a Global Account ID. If you have not been assigned an account, contact your Portal administrator. For more information on signing in to the portal, refer to the Portal Help.
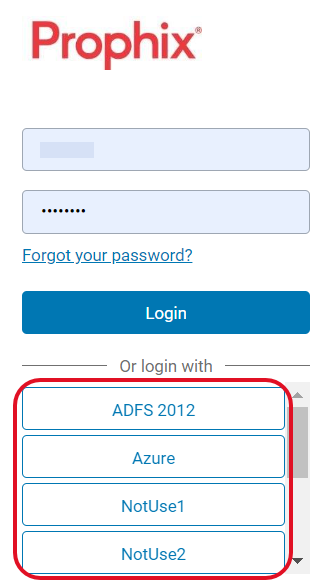
Use a Login Page
This method is for existing customers who purchased Financial Consolidation before January 2025. Existing customers will continue to log in through a dedicated login page with their usernames and passwords to access their accounts.
-
Go to your Login page.

-
Do one of the following:
-
Log in with your Username and Password. Enter your username and password in their respective fields.
-
If your account is configured for Single Sign On (SSO), click your company ID to use your company credentials to log in to Financial Consolidation.

-

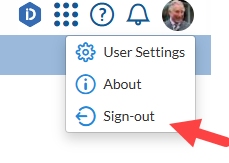
Sign out
-
On the top right of the page, click
 (Profile icon)
 -
Click Sign-out.
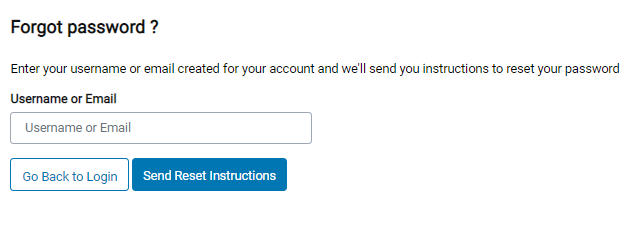
Reset your password
If you have forgotten your password, you may be able to reset it using the following steps:
-
Access the Login page.
-
Click the
 link.
link. -
On the Forgot password? page, enter your Username or Email address.
Ensure that you type your username or email address correctly.

-
Click
 . Instructions to reset your password will be sent to the email address provided, or associated with the username provided.
 -
Click
 to return to the Login page.
 -
Check your email for the instructions and follow them to reset your password. If you do not receive an email to reset your password, contact your administrator.
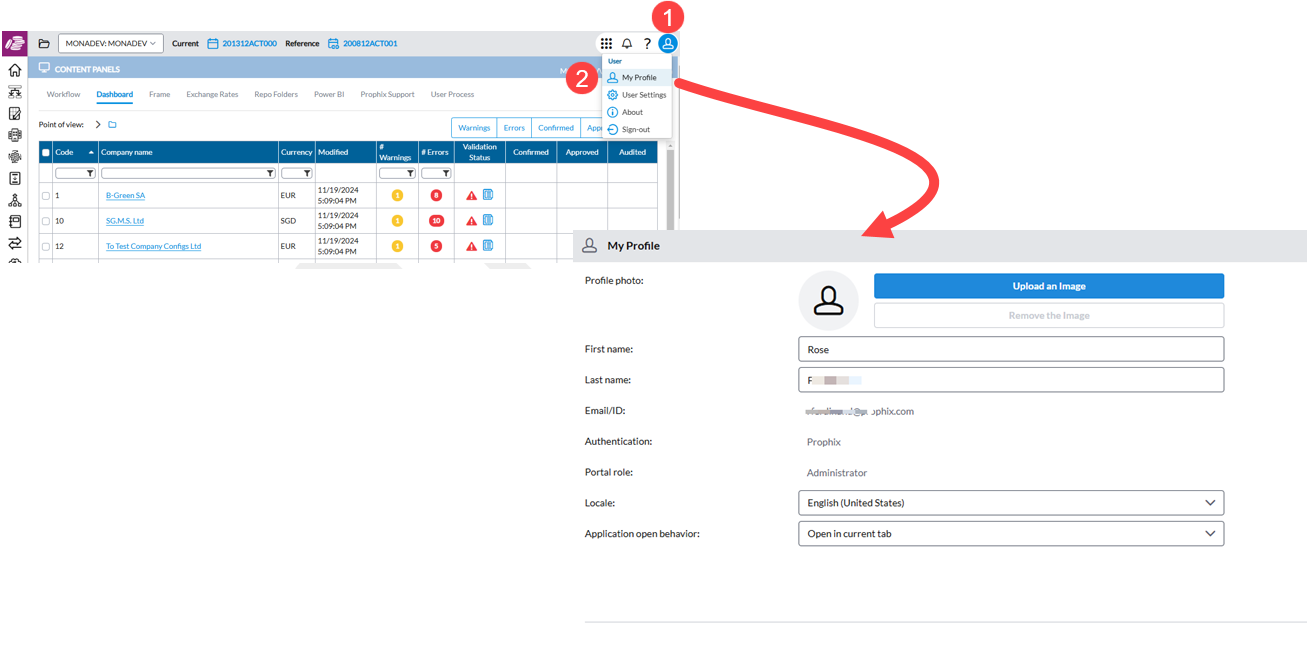
Upload profile photo
-
In the Portal, go to
My Profile.
-
On the My Profile page, upload an image.
The top bar
The top bar of every page provides you with access to key functions in Financial Consolidation.

From left to right on the top bar are the following icons and their functions.
|
Opens the navigation panel fully and closes it. |
Displays the notifications and reminders that were set up on the Workflow Definition page. |
 Consolidation field Consolidation fieldContains a drop-down list of all consolidation folders in the application. Customers usually have only one but some fiduciaries have many. |
  Use the menu to access the application’s Help system and other key resources, including the Academy, Community page, Product Feedback page, and Support requests. |
 Consolidation Periods
Current and Reference Consolidation periods. You can select a different consolidation period by clicking on any of the periods. |
Prophix One Copilot is a set of AI virtual assistants that can help you use Prophix One applications. The virtual assistants use a chat-style interface. You type questions and the AI responds. For more information, see Prophix One Copilot. |
 Applications Applications Contains links to the other Prophix One application. For example, the Data Integration link opens Data Integration where you can define data integration services with Financial Consolidation. See Data Integration for details. |
Clicking the Profile icon provides access to your Profile, User settings, and the Logout option. |
 Financial Consolidation application logo
  Notifications
 Prophix Copilot
 Profile
Side navigation menu
The navigation menu is the vertical panel on the left side of every page. It contains the icons and menus you can use to navigate and perform tasks in the application.

| Icon | Menu | Description |
|---|---|---|

|
Home | Takes users to their home page. |

|
Workflow | The workflow menu used for task setup and follow up. |

|
Data Entry | For entering statutory data and local adjustments. |

|
Group | For defining parameters of consolidation periods including currency rates, period, and scope. |

|
Automation | For process management, computing estimates, and running jobs. |

|
Adjustments | For recording corrections or business transactions that have not yet been included in the accounting records as of a specific date. |

|
Consolidation | This is the core of the consolidation process. It includes adjustments, events, intercompany data and running consolidations. |

|
Reports | Includes standard reports, user defined reports, and analysis reports in pivot table format. |
|
|
Transfers | For import / export of data, structures, and translations. |

|
Configuration | Includes system structures, periods, and group management. |

|
Administration | System and security administration and control panel management. |
Common buttons and their functions
The following buttons can be found in almost all the pages of the application:
| Button | Function |
|---|---|
 |
Looks up relevant results for typed-in text. Search for entities, dimensions, adjustments, etc., and then, use filters to narrow your search results to just what you need. Also, the Search button pulls up a “selection” pop-up, in which you can perform a search to find relevant data. See Searching in dialogs. |

|
Each button clears the right-side panel of the page, allowing you to create a new record (entity, flow, adjustment, report) etc. |

|
Takes the selected item or record away from where it was. When a record is removed, it can be restored. |

|
Each button erases or eliminates selected item or record. |

|
Commits a new record into the database, or saves the modifications you make to an existing record. It is important to save your input before leaving a page. If you do not and navigate away from a page without clicking the Save button, your input will not be saved. |

|
Cancels all modifications that were made since the last save. |

|
Moves to the next record available. |

|
Goes back to a previous record. |

|
Clicking this option generates a report in a format selected by the user and stores it in a temporary drive on the user's desktop. To save the report, user must open and then, save it to a specific location. |


Terms and usage
This section explains how some terms are used in Financial Consolidation.
| Term | Meaning |
|---|---|
| Period |
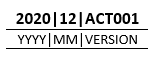
Consolidation period—a set period of time to manage (record and report) all financial transactions related to the companies in a group, usually written in this format: 202012ACT001.
Version is a combination of the Category (ACT =Actual, BUD = Budget) and Version Number. When a consolidation period is initially created, the version number assigned to it is 000. If a consolidation period is duplicated, the version number increases to the next (incremental) e.g., 001. Typically periods are set to begin and end based on calendar months of the year (12 months, yearly). They can however, be set to any length of time: 3 months, quarterly; 6 months, semi-annually, etc. There are two periods used in the application: Current and Reference. |
| Current Period |
This is the current (active) consolidation period. The Current and Reference consolidation periods appear on top of every page. |
| Reference Period |
This is a closed consolidation period you can choose to retrieve your opening balance for the current consolidation period. The Current and Reference consolidation periods appear on top of every page. |
| Flows |
Flows refer to transactional activities that impact the balance sheet and must be recorded for accurate cash flow calculation. Flows can be Cash (C) and Non-Cash (NC). |
| Dimensions | Dimensions are optional hierarchical structures that are used to capture transactions and organize them in a way that allows an organization to gain additional insight into its financial data. |
|
Bundle |
Bundle is used to describe the local data (accounting entries) of an entity or subsidiary. |
| Period | Consolidation period. |
| IC | Intercompany. |
Filtering
You can filter lists by using wildcards in conjunction with the Search button.
Wildcards are special characters that can stand in for unknown characters when querying values from a list.
There are two wildcards used in the application:
| Character | Description | Example |
|---|---|---|
| * | Matches any number of characters. You can use the asterisk (*) anywhere in a character string. | 123* finds 1234, 1237, 123456 |
| ? | Matches a single letter in a specific location. | 123? finds 1234, 1237, but not 123456. This wildcard or filter allows only 4-digit length. |
Launching reports
All reports that are available in Financial Consolidation can be launched as PDF or Excel files, allowing you to print or save them for later use.
When you click the View report button on a page, the report is generated and hyperlink to the report is displayed. This hyperlink remains visible until you navigate away from the page.
For more information, see Launching Reports.