Local adjustments - manual input
The Local Adjustments Manual Input page allows you to enter adjustments manually. To import adjustments, see Import Adjustments.
To access the Local Adjustment Manual Input page, click  Data Entry > Manual Data Entry > Local Adjustments > Manual Input.
The top part of the page is where you enter general adjustment-related information.
-
Company - company code and name.
-
Journal - journal code and name.
-
Associated Journal - journal into which the adjustment will be carried forward.
-
Journal Entry - number assigned automatically by the system to the adjustment. You can change this number if you wish.
-
Currency - Not applicable to local adjustments.
-
Third Party - Not applicable to local adjustments.
-
Behavior - the action that will only be taken into account when we create a new period in a new year. For example, carry it forward to reserve, copy, reverse, etc. From the drop-down list, choose an option.
-
Attachment - using the upload icon, allows a document to be uploaded and attached.
-
Created - Date on which the adjustment record was created. System-populated after you save the adjustment.
-
Modified - Date on which the adjustment record was modified. System-populated after you save the adjustment.
-
By - Name of the person who created the adjustment. System-populated after you save the adjustment.
Just above the data area are the following additional functions:
-
Sort - Not applicable to local adjustments.
-
Tax - Not applicable to local adjustments.
-
 - opens the View by Account pop-up, and displays Debit /Credit sums by account.
 -
 - opens the Multiply /Divide pop-up, allowing you to divide or multiply the selected amounts.
 -
 - adds a new set of rows below the existing rows.
In the data area below, note the following:
-
When you select an existing adjustment, the lines in this table are populated by the system.
-
When you start with a new adjustment, empty lines are displayed.
-
When adding a row for a new adjustment, this is the data area where you enter different lines for the adjustment
-
Line - line number of the adjustment.
-
Account - account code and the account description. You can use the
 to search for an account. The code and description of the account you select are populated in their respective fields.
 -
On each row are the Repeat , Difference, and Delete buttons:
-
 Repeat button - allows you to repeat the amount from the current line on all the following lines. The amount will be repeated by alternating between Debit and Credit.
 -
 Difference button - puts the difference between the total Debit and Credit to the amount on the selected line.
 -
 Delete button - deletes a selected line.
-
- Debit - total of debit amounts automatically calculated.
-
Credit - total of credit amounts automatically calculated.
-
Diff- the difference between the total credit and debit amounts.
Below the data area are the following additional functions:
-
 - allows you to start a new blank adjustment.
 -
 - allows you to start a new adjustment by copying the layout of the current adjustment. Everything is copied except for the adjustment description and the amount of each adjustment line.
 -
 - navigates away from the Local Adjustment Manual Input page and takes you back to the View Local Adjustments page.
Note: All modifications that you made will be lost if you click the
button without saving. -
 and
and  - allow you to navigate back and forward through the list of local adjustments.
Enter a local adjustment
-
In the Company field, enter a company code or click
to search for a company. Either way, the company Code and Name are displayed in their respective fields. -
In the Journal field, enter a journal code or click
to search for a journal. Either way, the journal Code and Name are displayed in their respective fields. The Associated Journal and Journal Entry fields are populated based on your entry or selection. -
In Line 1 (data area) , enter an account number or click
to search for an account. -
Do one of these:
-
If the adjustment amount is a debit amount, enter in the Debitfield.
-
If the adjustment amount is a credit amount, enter it in the Credit field.
-
-
Click
to calculate the Sum Debit, Sum Credit, and Difference amounts. -
Click
 .
.
Multiply / Divide an adjustment
The Multiply / Divide button is very useful during a monthly reporting. You can easily recalculate a provision, depreciation, etc. to the Year-To-Date value.
Note: The Multiply / Divide button will work on all the lines that you select.
-
Select adjustment lines
-
Click
. The Mulitply/Divide pop-up appears.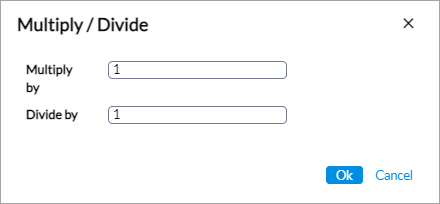
-
Enter the fraction by which you want to multiply or divide.
-
Click
 . The amounts are recalculated.