Working on tasks
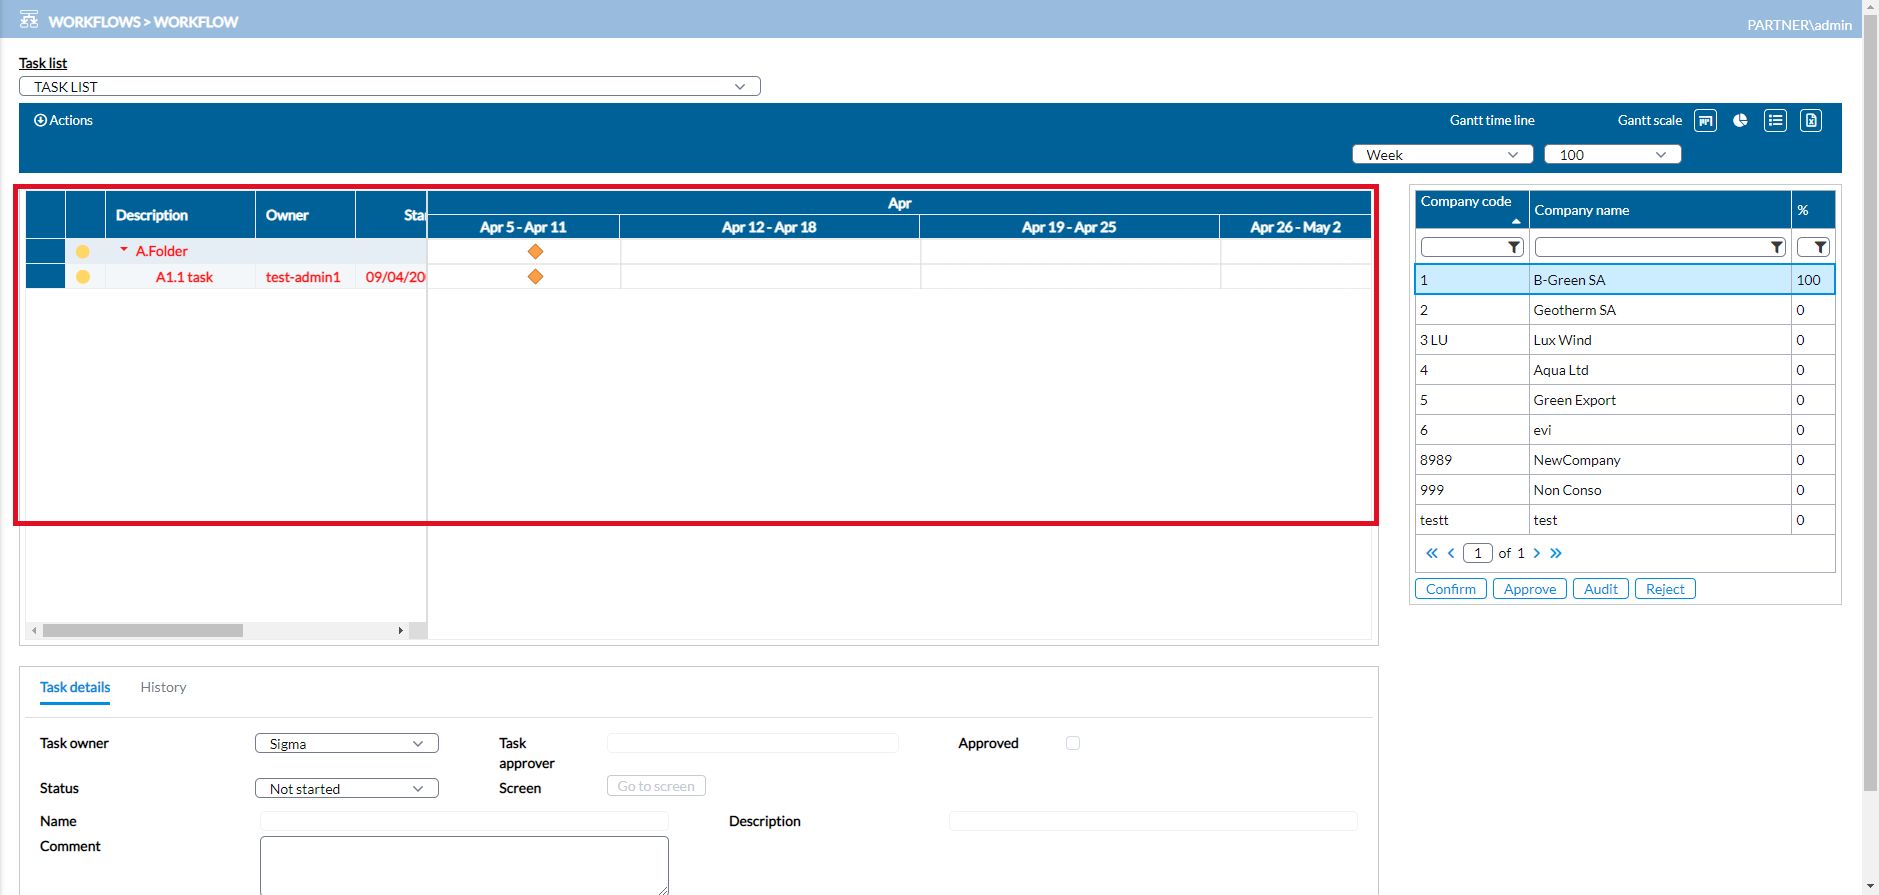
The Workflow page displays the tasks assigned to you. Each task has a description, owner, start and end date, and status.
To access the Workflow page, click  Workflows > Workflow.
The Task list field contains a list of tasks assigned to the task owner. Select a task from this list to see the individual tasks in the chart below.
The Gantt chart displays the tasks in a selected list, including the following:
-
Description
-
Owner
-
Start and End dates
-
Status
Note: You have the options to change the way task information is displayed to you. You can show/hide the Gannt chart, the Pie chart, or the table of Companies. See Set your preferences.
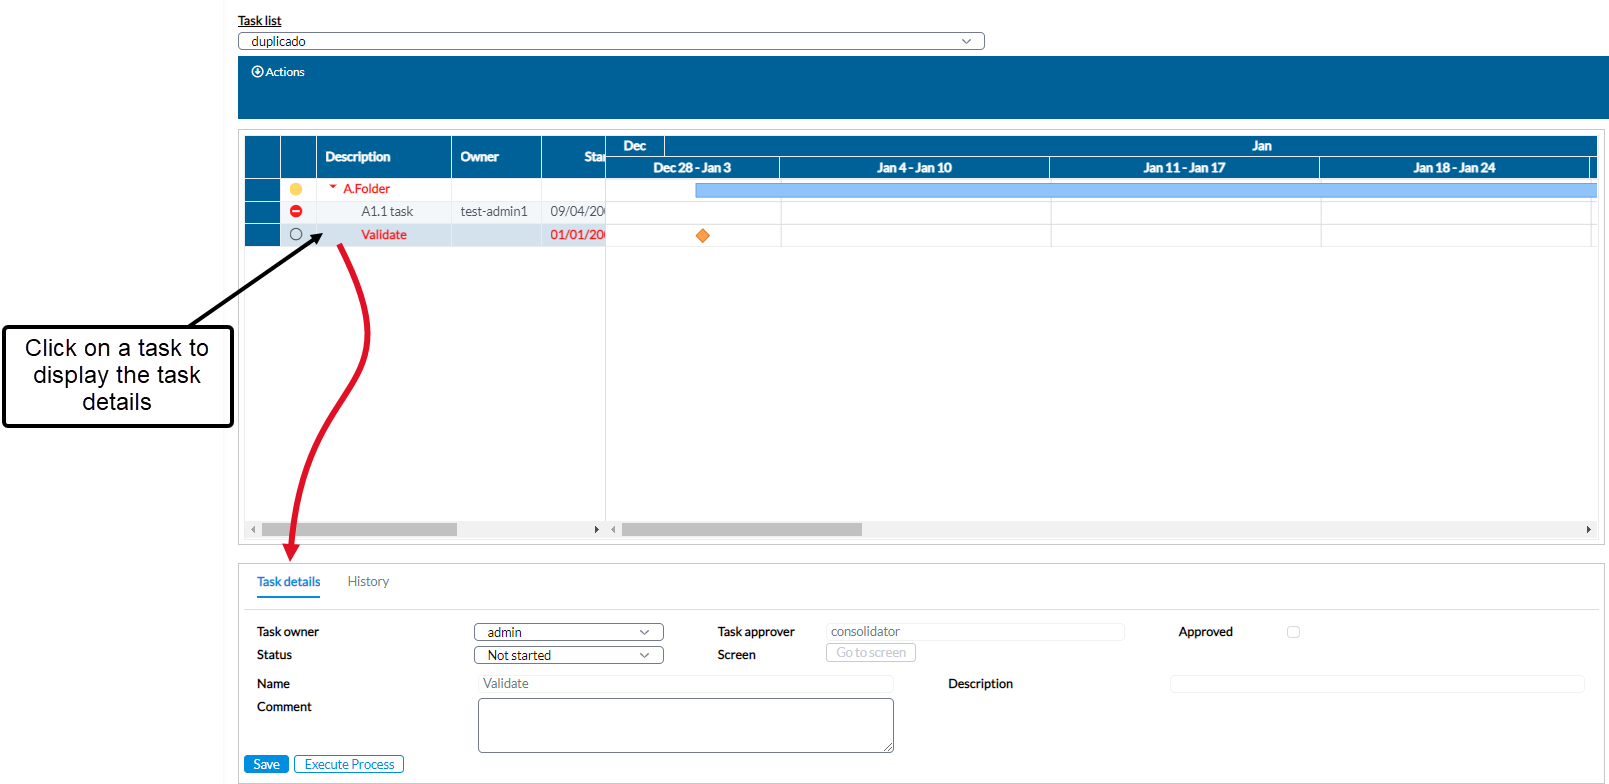
The Company table displays a list of companies to which the user has access. It shows the Company code, Company name and % (progress of work done). Authorized users are able to manage the work done in these companies using the applicable buttons: Confirm, Approve, Audit, Reject.
Set your preferences
You can set preferences to control how information is displayed to you on the Workflow page.
You can:
-
Show /hide Gantt chart
-
Show /hide Pie chart
-
Show /hide Companies

Show /Hide Gantt chart
If the Gantt chart is not your default display, you can show it by selecting  (Show /Hide the Gantt Chart icon).
The Gantt chart, when selected, displays tasks according to the set timeline and scale. You have the option to change this by using the Gantt timeline and Gantt scale drop-down fields. You can choose to display the tasks by Month, Day, Week, etc., and the unit you select from the Gantt scale drop-down.
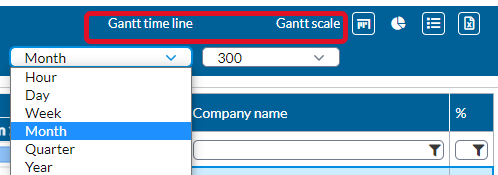
To hide the Gantt chart, click to cancel the selection.
Show /Hide Pie chart
Instead of having your tasks display in a Gantt chart, you can opt to display them in a pie chart. To do so, select  (Show /Hide the Pie Chart icon). Tasks will be displayed similar to the following:
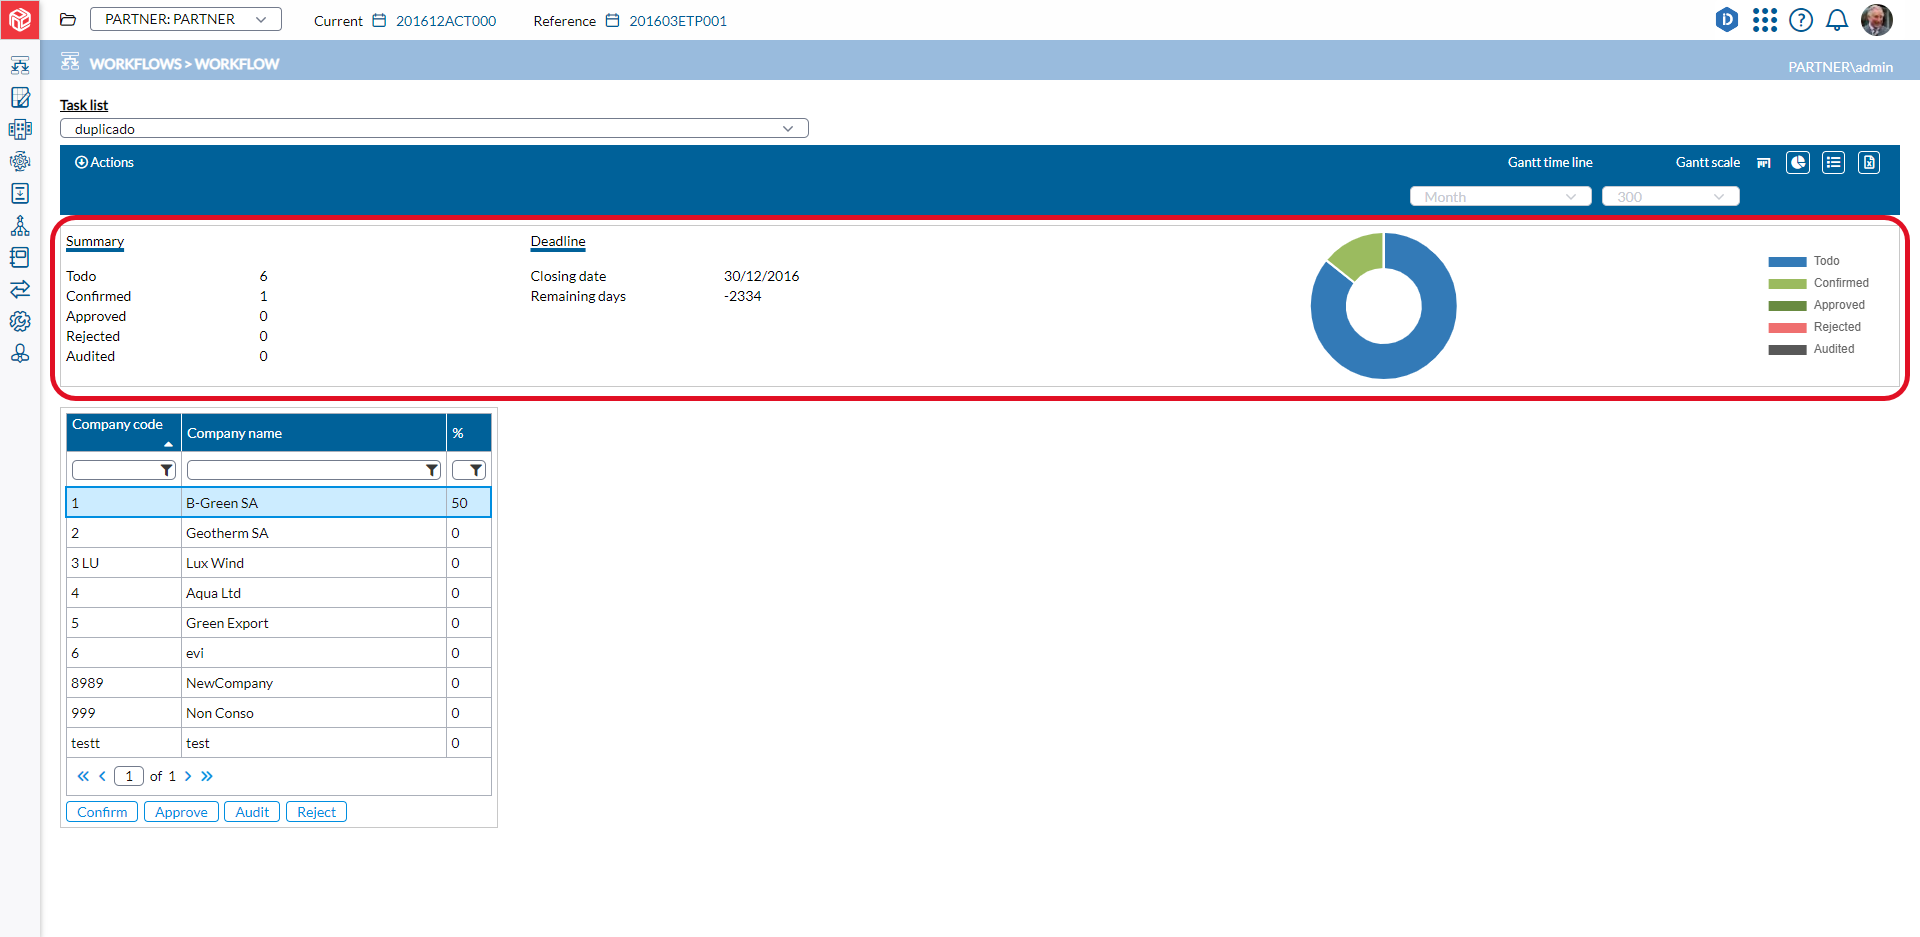
To see the status represented by a color in the pie chart and the count of tasks associated with that status, hover your mouse over the color. To hide the pie chart, click to cancel the selection.
Show /Hide the companies
To show or hide the list of companies, select  (Show /Hide the companies icon). When selected, the table of companies is displayed.

To hide the companies, click to cancel the selection.
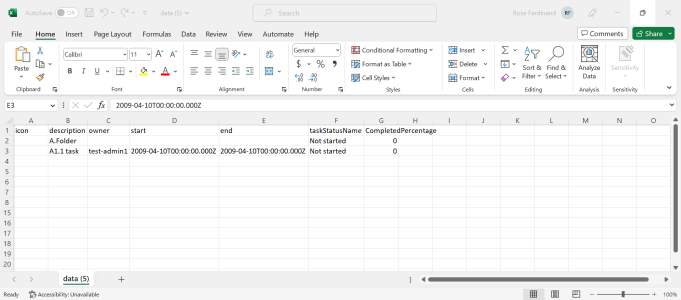
Export tasks
When you prefer to work with your task list in Excel, you can easily click  (Export to Excel icon) on the Workflow page to export your task list data to Excel.
-
From the Task list field, select the list that you want to export.
-
Click
to export the list to an Excel file on your computer. -
Browse to your default downloads folder and select the Excel file.
-
Open it to view the exported task list.

Task user types
-
Task owner- single user responsible for doing the task.
-
Task approver - user responsible for reviewing work done by task owner.
Start work on a task
-
Select the company you want to work on from the table of companies (if you have access to more than one company).
-
In the Task list field, select a task. The tasks in the list you selected are displayed in the chart below.
-
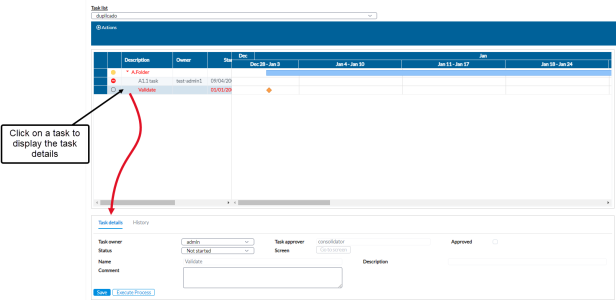
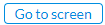
Click on a task to see the details on the Task details panel.
-
To start work on the task, in the Status field, where you reflect your progress on the task, change from the default Not started to In progress.
-
Do one of the following:
-
If
 is activated, click it to navigate to the page where you will perform the task.
 -
If the task is an automated task, the
 button is activated. Click it to start the process.
-
-
You can use the Comment text box provide additional information to yourself or the approver.
-
Click
 .
.
Complete a task
-
After you have successfully completed a task, return to this page to provide an update on your progress and let the approver know that your work is now ready for review.
-
Select the company from the table.
-
In the Task list field, select the task.
-
On the chart, click on the task to see the details on the Task details panel.
-
Go to the Task details panel, and in the Status field, select Completed.
-
Optionally, add notes or comments in the Comments field to provide additional information to the approver, explaining what you did or why you did it.
-
Click
. Note: When you change the status of task to Completed, an automatic mail is sent to the approver /administrator for approval.
Reject a task
If you want to reject a task that was assigned to you, you can do so by following these steps:
-
Select the company from the table of companies.
-
In the Task list field, select the task.
-
On the chart, click on the task to see the details on the Task details panel.
-
Go to the Task details panel and in the Status field, select Rejected.
-
Add notes or comments in the Comments field to provide your reason for rejecting the task.
-
Click
. Note: When you change the status of task to Rejected, an automatic mail is sent to the approver /administrator to notify them.
View task history
The history of a task can reveal its life cycle to you. For example, looking at the history, you can tell whether it was ever rejected and who rejected it.
Each status of a task is recorded in the application during its life cycle and represents the stage of the task (Not started, In progress, Rejected, etc.) at a particular point.
To view the history of a task, do the following:
-
Select the company from the table of companies.
-
In the Task list field, select the task.
-
Go to the History tab. A table is displayed showing the history of the task

Note: You can use the Created by and Created filters to narrow your results to one status only or user only.
Update company task status
Depending on your role and your organization's approval workflow, the buttons below the Companies table may vary:
-
Confirm: Accessible to end users, this button is used to indicate the completion of all tasks assigned within a company. Clicking Confirm triggers an email notification to the auditor/administrator, who verifies the user's work. Once a user confirms their own work, they are unable to make further changes to the data unless rejected by the approver.
-
Approve: This button is available to administrators, auditors, and consolidators. If work is checked and approved by any of these roles, the end user receives an email notification.
-
Audit: This button is specific to the auditor role. To validate a company's figures, an auditor can select a company, click Audit to gain data access, review the figures, and choose to either Approve or Reject the data. If the figures are approved, the consolidator is notified to proceed with the audited figures. In the case of rejection, the end user is notified via email to make the necessary corrections.
-
Reject: Available to administrators, auditors, and consolidators, this button allows any of these roles to reject checked work. If work is rejected, the end user receives an email notification to make the required corrections.
You can monitor the progress of work completed for each company on the Dashboard.