User security
On the Users/Customers page, the administrator can authorize users to access customers (companies) and assign them appropriate permissions based on their designated user roles, allowing users to conduct specific tasks relevant to their assigned responsibilities.
Administrators can also copy rights from one period to another, using the Bulk Actions tab.
To access the Users/Customers page, click  Administration > Security > Users/Customers.
Note: Customer independent is an option that can be used to give a “super user” right to a user. When this option is selected for a user, that user will have access to all the customers and their data, just like the Admin. It is recommended that one user is given this right.
Grant user access to customer data
-
In the General tab, on the left-side panel, select the login ID of the user to whom you want to grant customer data access. The user's login details appear in the top right-side panel and customers, if any, they have already access to, are displayed in the table below.
If the user is not on the list, click
 to gain access to the Management Console and add the user.
Prophix One Portal users, click to access the User Management page. For more information on managing users on the portal, refer to Manage users.
 Only an administrator can add a user.
Note: To ensure that the user gains immediate access to the customer data after setup, select
 .
. -
Click
 to display the Details pop-up.
 -
Provide the information required in each field:
-
From the Customer drop-down, select a Customer ID from the list of Customers.
-
In the Role field, select a specific role for the user. The possible roles are:
-
Administrator- gets full access to all menus.
-
Consolidator - gets full access to all menus except for the Configuration – Administration menu.
-
End-User - gets full access to the Data Entry menu and some of the Reports menu.
-
Auditor - gets the same access as Consolidator, but in read-only mode.
-
-
Optionally, to restrict the user to the role selected, click Restricted.
- Curr. Period- enter the current consolidation period or click
 to search for the one you want.
 -
Ref. Period - enter the reference consolidation period or click
to search for the one you want. -
Data Language - select the language that will be used by the user for the data.
-
App Language - select the language that will be used for the application menu.
-
Culture Info - select the regional settings that will be used by the user.
-
Click
 . You are returned to the main page.
-
-
Returning to the main page, you will find the customer you selected displayed in the Customers tab.
-
On the customer row, you have these options:
-
 - click to access the Conso Security page where you can specify which of the customer's consolidation period(s) the selected user can access.
 -
 - click to modify the customer/user details. On the Details page, you can restrict the user’s access to the customer’s data. See Restrict user role access in Role Security.
 -
 - click to delete the row.
-
-
Click
.
Copy access rights from one period to another
This feature allows administrators to quickly and efficiently copy rights from one period to another. It gives access to the periods and companies for all users and roles, including Administrator, Consolidator, End user, and Auditor.
-
Click the Bulk Actions tab.
-
Select the Customer.
-
In the Source period code and Target period code fields, select the relevant periods.
-
Click
 . A warning is displayed.
 -
Confirm your action.
API secrets
When using Multi-Factor Authentication (MFA) in the Prophix One Platform, API secrets require an authentication code for users signing in with a username and password in Excel, Web Connector, and Restore from URL.
To simplify authentication, admins can generate an API key, which can be used:
-
In Excel for authentication
-
To restore backups from a URL
-
In web services, allowing authentication via API secrets instead of a username and password
Add API key
-
Select the user for whom you want to create an API key.
-
Click the API Secrets tab.
-
Click
. -
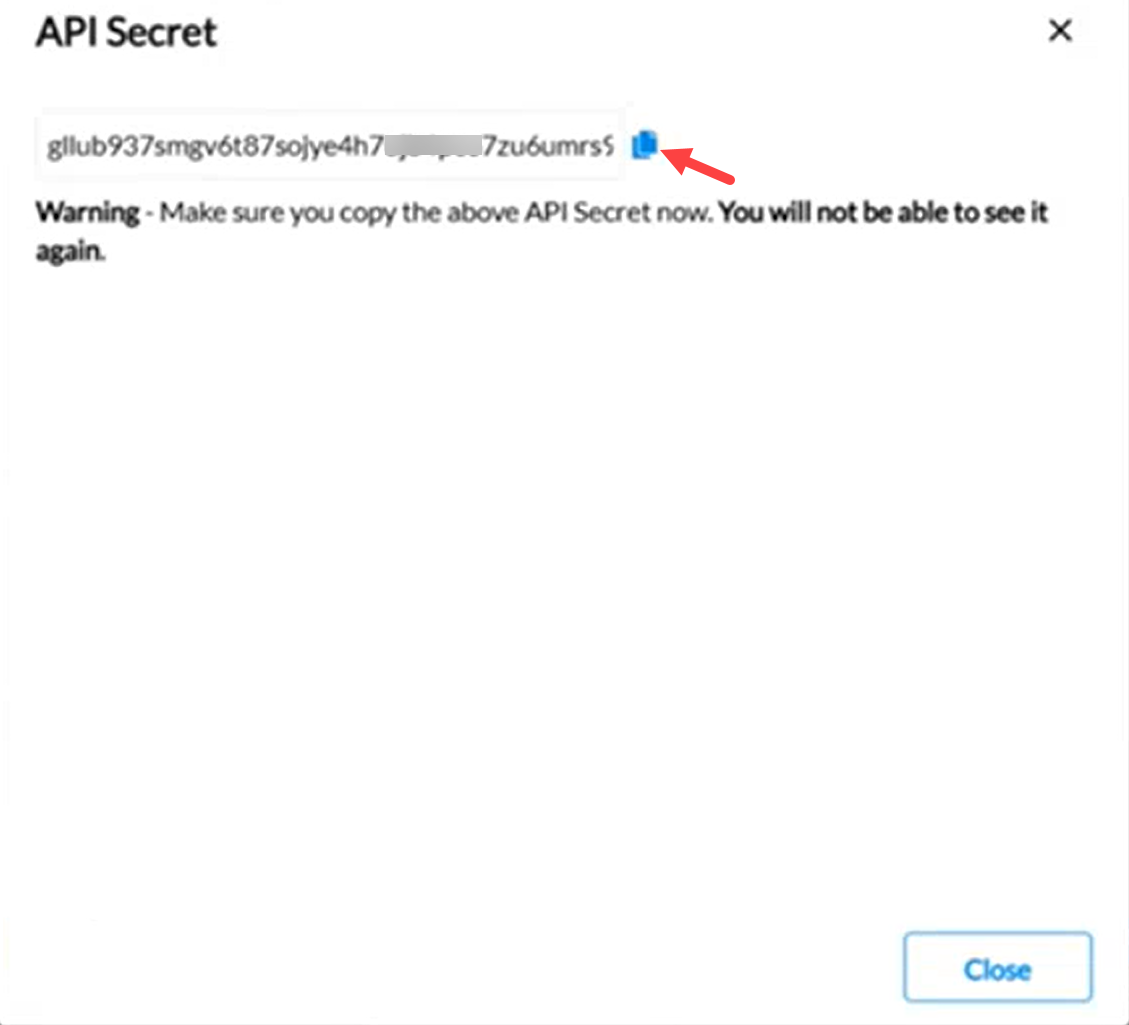
Provide the required Details: Description and Expiration date, and then activate
the API key. -
Save the API key. The generated key is displayed only once. Copy it now as you will not be able to retrieve it after closing the dialog.
-
Share the generated API key with the user.
Note: API keys have an expiration date. Once expired, a new key must be generated to maintain access. See Regenerate API Key.
-
For more information, refer to the API keys for authentication and access article.
Regenerate API key
Regenerating an API key is typically done in the following circumstances:
-
When the current key has expired (it’s valid for up to one year)
-
When there is s a concern that the key may have been compromised and is being used by an unauthorized party and needs to be revoked.
-
Click on the user’s User ID. The API key details are displayed in the API Secrets tab.
-
Click
 in the row of the key you want to regenerate.
 -
Confirm your action.
Deactivate API key
-
Click on the user’s User ID. The API key details are displayed in the API Secrets tab.
-
Click
 to deactivate the key.
 -
Confirm your action.
Delete API key
-
Click on the user’s User ID. The API key details are displayed in the API Secrets tab.
-
Click
to deactivate the key. -
Confirm your action.
Manage Global Admin assignment
The Global App Admin is a special user role with full administrative access across the application.
-
Only one user can be assigned as the Global App Admin at a time.
-
The Global App Admin:
-
Is automatically assigned Administrator and Customer Independent roles.
-
Has access to all periods and all companies.
-
Cannot have the Customer Independent setting removed.
-
View the current Global App Admin
Note: The Global App Admin button is visible only to users marked as Customer Independent.
-
Go to
Administration > Security > Users/Customers.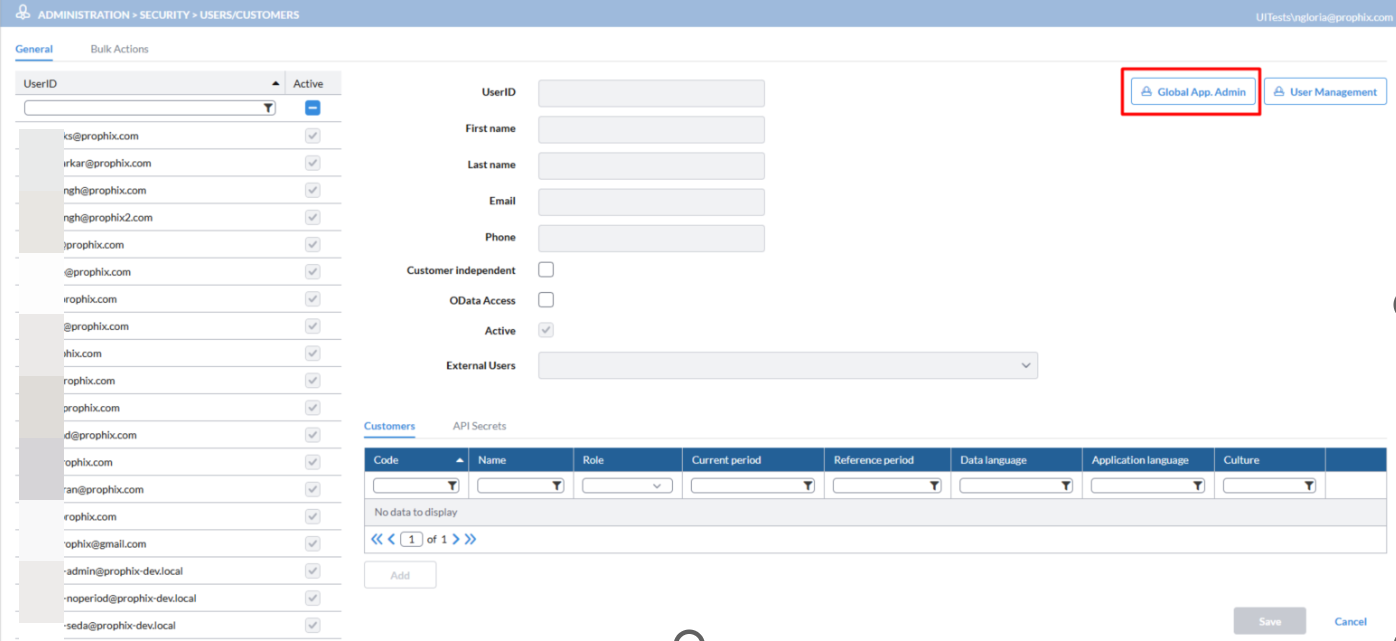
-
Select Global App Admin. The current global admin is indicated in the list displayed.
If the user is not on the first page, navigate through the pages to locate them,
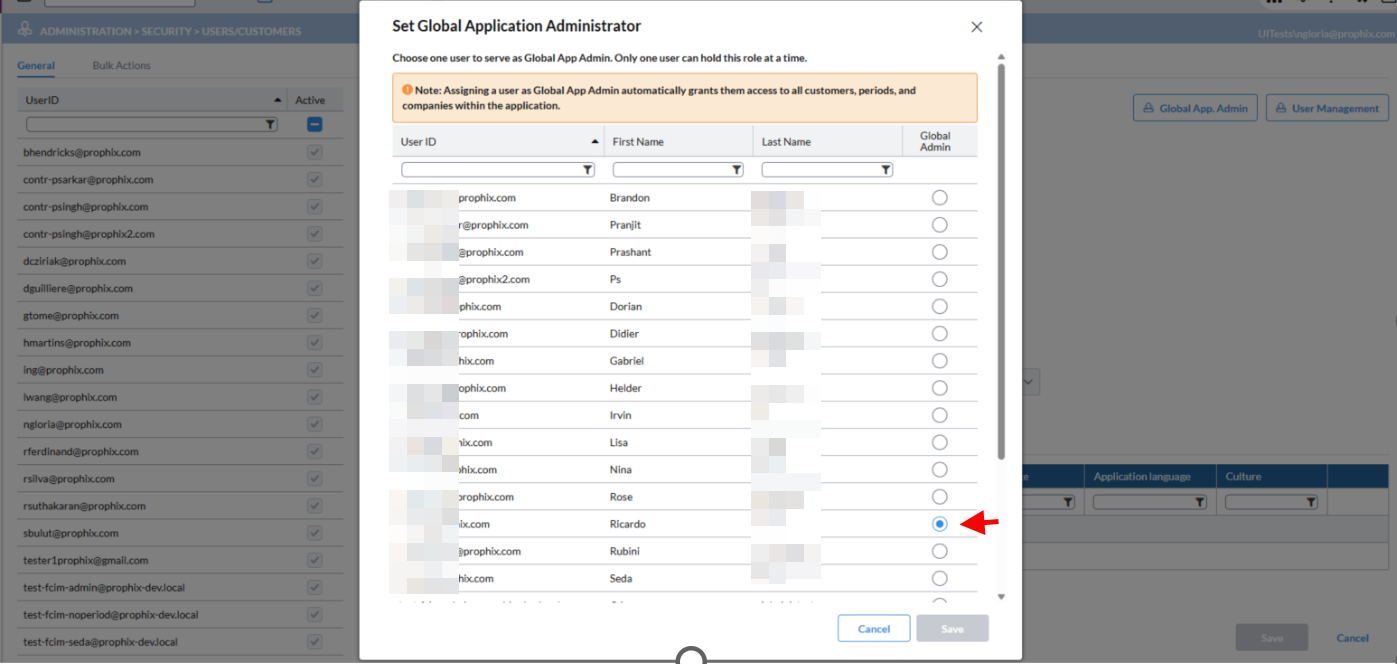
Change the Global App Admin
-
In
Administration > Security > Users/Customers, select Global App Admin. -
From the list of users displayed, select a different user.
-
Confirm the change. The selected user becomes the new Global App Admin and is automatically granted the required access and permissions.