Analytical dimensions
The Analytical Dimensions page lets you capture financial transactions in more detail than account numbers alone allow. Use analytical dimensions to break down account values across different groups.
Note: To add a large amount of dimensions at once, use the Import functionality.
To access the Analytical Dimensions page, go to  Data Entry > Data Entry, then click the Analytical Dimensions tab.
Enter analytical dimensions
- Select a Company. The Currency field displays the currency of the selected company.
-
Select an Account.
-
Select an applicable Dimensions Group.
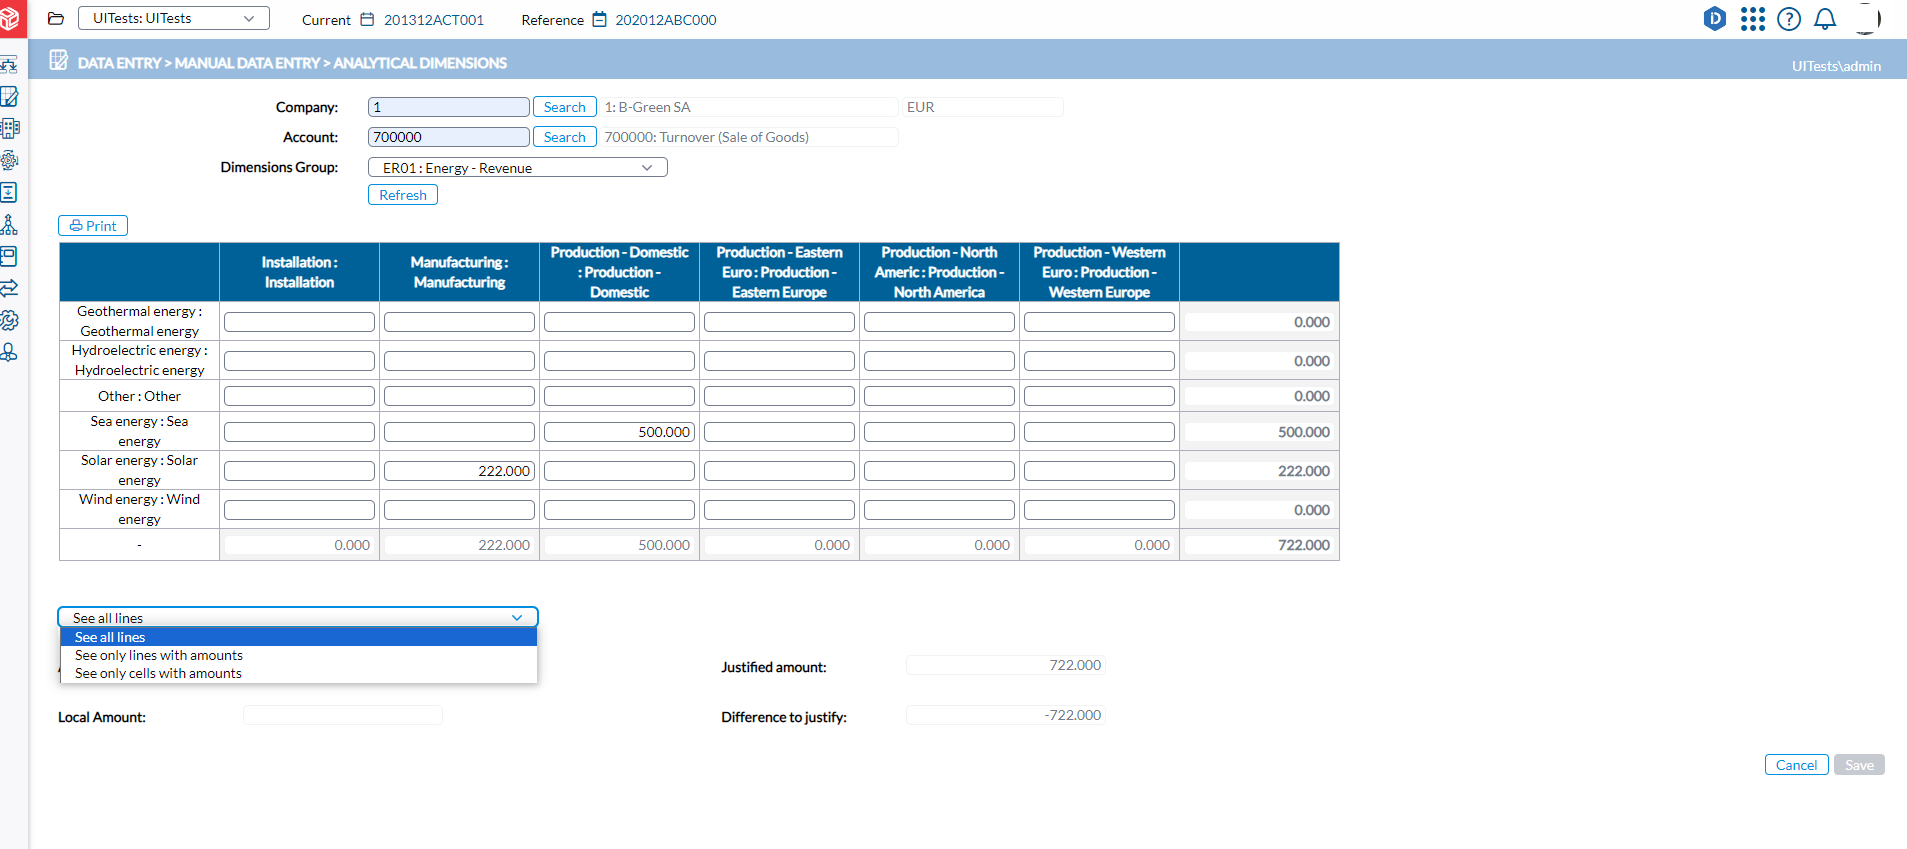
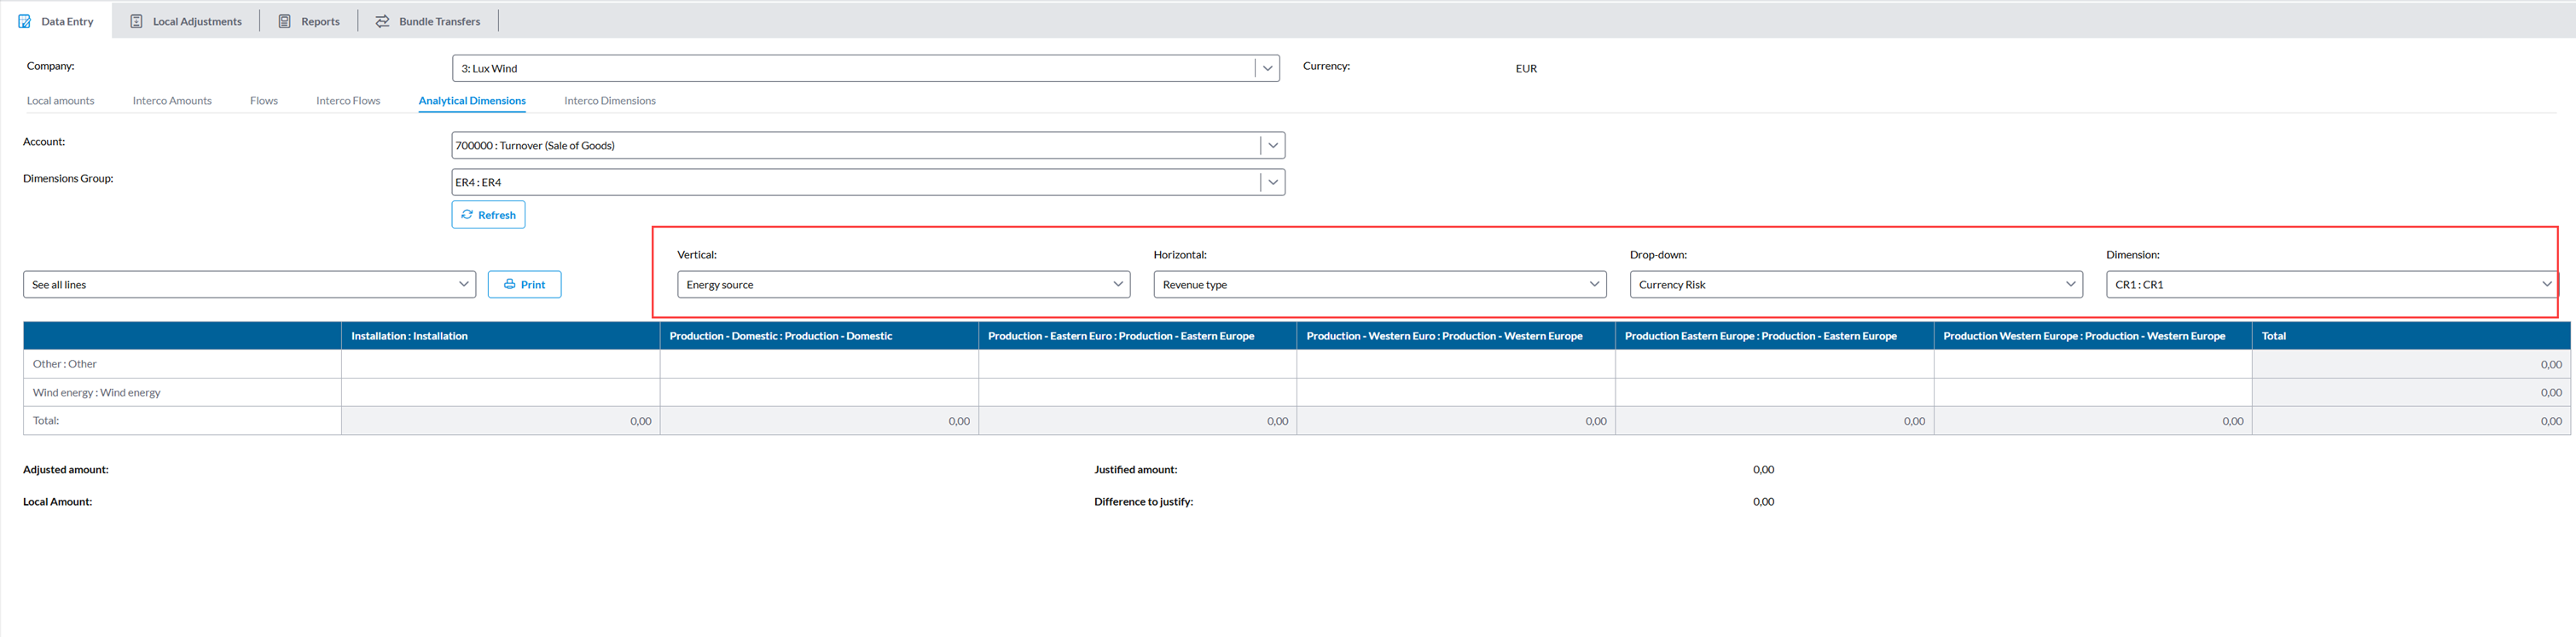
The table displays dimension values for the selected combination of company, account, and dimension group. By default, dimensions appear in the following layout:
-
Dimension 1 — displayed in rows
-
Dimension 2 (if applicable) — displayed in columns
-
Dimension 3 (if applicable) — displayed as a drop-down list
-
-
Optionally, use the filter drop-down to control which rows are shown:
-
See all lines (default)
-
See only lines with amounts
-
See only lines without amounts
-
-
In the table, enter the values for the dimensions.
-
The Total field displays the sum of the values you enter in each row/column.
-
The footer displays the following amounts as applicable:
-
Adjusted amount — The amount from local books, including local adjustments made in Financial Consolidation. This amount should equal the total of all values in the detail area.
-
Local amount — The amount from local books, excluding local adjustments made in Financial Consolidation. This amount comes from the ERP. The difference between the adjusted amount and the local amount reflects local journals.
-
Justified amount — The total of all values entered for the company/account/dimension group combination, including values not directly visible in the table.
-
Difference to justify — The difference between the justified amount and the adjusted amount.
-
-
-
Save your input.
Additional functions
-
 — Clears any unsaved values you have entered in the table and reloads the last saved data. Use this button to discard your current input before saving.
 -
 — Reverses all values entered since the last save. Use this button after saving to restore the table to its previous state.