System configuration
The System Configuration page is used to update specific values that impact the general behavior of the application.
To access the System Configuration page, click  Administration > System Administration > System Configuration.
Caution: Do not update this page without first seeking advice from your consultant.
The content of this page may change based on the version and on the update script imported in to your application.
General
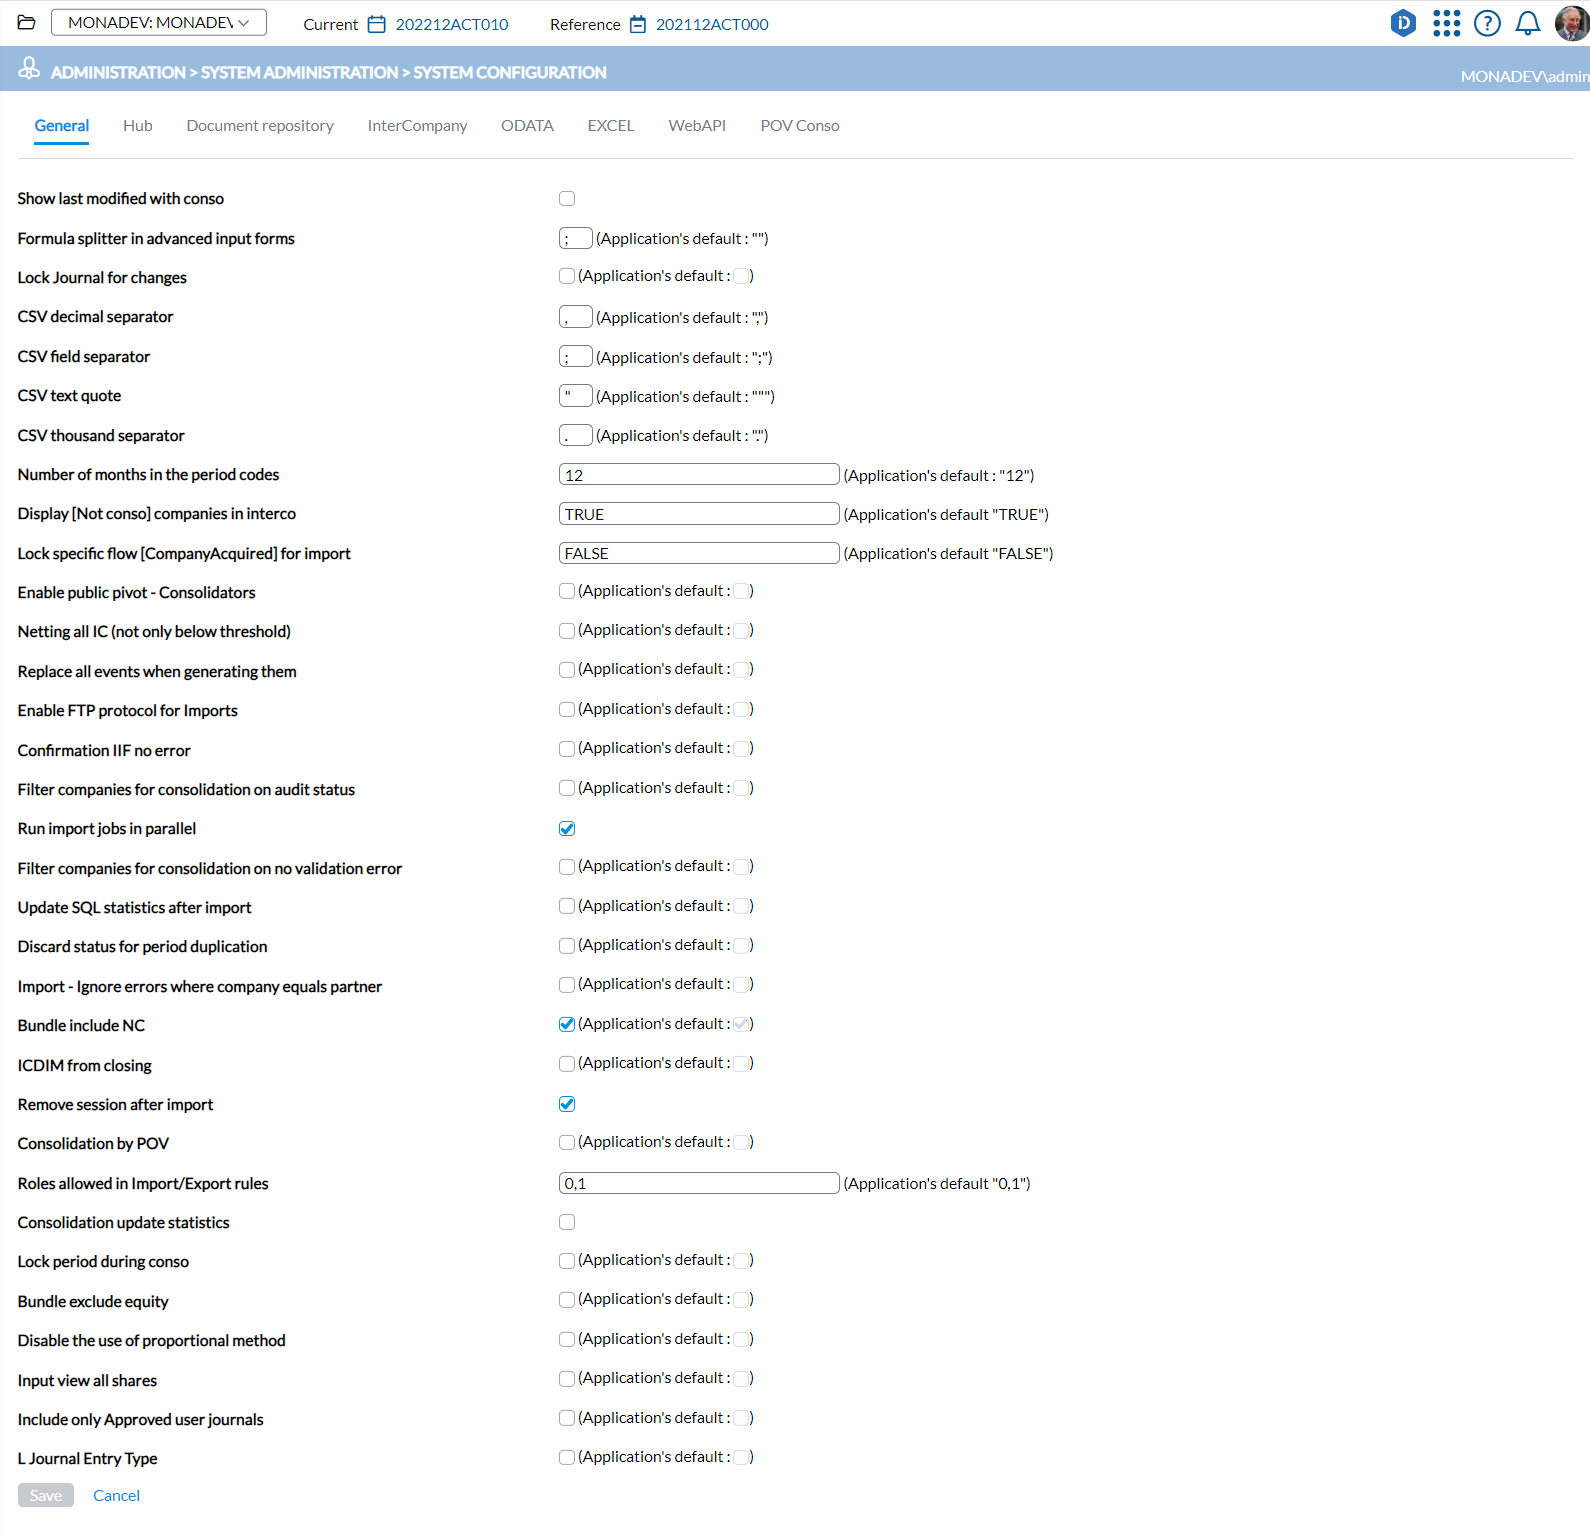
The following are the descriptions and functions of the keys on the General tab:
-
Formula splitter in advanced input forms: The character (such as a semicolon or comma) used to separate attributes in advanced input form Excel formulas. Enter a character that matches your regional settings.
-
Lock Journal for changes:Prevents users from editing a saved journal entry. To correct a journal entry, create a new entry to offset the original.
-
CSV decimal separator: The character used as the decimal separator in CSV files exported from the application (for example, a period or comma depending on your regional settings).
-
CSV field separator: The character that separates fields in import and export CSV files (for example, a comma or tab).
-
CSV text quote: The quotation mark style (single or double) used to wrap text strings in CSV files. Quotation marks prevent values that contain special characters from being misread and kept intact.
-
Number of months in period codes: Defines the number of months in a period code. The default is 12 months, but you can configure up to 16 months to meet country-specific fiscal requirements.
-
Display [Not conso] companies in interco: By default, intercompany transactions only display consolidated companies. However, with this option, you can choose to show (set to "true") or hide (set to "false") non-consolidated companies. For Non-consolidated companies, the Consolidated option is not selected on the
 Group > Companies page.
 Note: Since this feature is intended to allow data input exclusively for non-consolidated companies, transactions involving non-consolidated companies will not be eliminated, as they are excluded from the consolidation process.
-
Lock specific flow [CompanyAcquired] for import: When set to “true”, prevents importing the CompanyAcquired specific flow when a company enters the consolidation scope. The CompanyAcquired flow is configured at
 Configuration > System Structures > Flows > Chart of Flows > Specific Flow.
 -
Enable public pivot - Consolidators: This feature allows consolidators to edit public pivots. Typically, only the user who created a public pivot and the administrator have editing privileges. However, with this option selected, consolidators gain the ability to edit the pivot as well.
-
Netting all IC (not only below threshold): Nets all intercompany transactions during eliminations, not just those below the defined threshold.
-
Replace all events when generating them: If selected, previously generated events will be replaced by new events as they are processed — previously generated entries will be deleted by journal type.
Note: To carry forward the journal, it is mandatory to use another journal so that the entry is kept and not deleted.
-
Confirmation IIF (if and only if) no error: When enabled, users can only confirm a company's data entry status if no errors are present in the data. Confirm status using the Confirm option on the Change Status panel at
Administration > Content Panels. -
Enable FTP protocol for import: Allows users to select FTP for file import, specify the server type, and use basic authentication using a username and password.
-
Filter companies for consolidation on audit status:Excludes companies from consolidation if they have not been approved by an auditor. A company must receive auditor approval to be included in consolidated results.
-
Run import jobs in parallel: Controls whether data imports run in parallel or sequentially. Running imports in parallel can improve performance when processing large volumes of data.
-
Filter companies for consolidation based on validation error: Excludes companies with validation errors from consolidated data. Validation results, including the number of warnings and errors per company, are displayed on the Dashboard. Errors must be resolved before the affected company is included in consolidation.
-
Discard status for period duplicationWhen duplicating a period, excludes the period's status from the duplication. Use this option when you want to copy period data without carrying over its current status.
-
Update SQL statistics after import: Updates database statistics immediately after each import. This may slightly slow the import process but improves performance for report generation and Excel data retrieval. Recommended only for environments with a high volume of imports in a short time.
-
Import - Ignore errors where company equals partner: Ignores errors caused by intercompany transactions recorded against the company itself. Since a company cannot have an intercompany relationship with itself, these errors are excluded from the import validation report.
-
Bundle include NC (Not Consolidated): When selected, exported offline bundles will include non-consolidated companies, allowing the input of intercompany transactions involving these entities.
-
Remove session after import: Removes the temporary session created during import once the process is complete. Recommended for optimal system performance.
-
Roles allowed in Import/Export rules: This option enables you to designate the user role with access to and authority to define rules in the Import Rules tab of the
 Transfers > Data > Define File Structure > Import page and the Export Rules tab of the Transfers > Data > Define File Structure > Export page:
-
0 = enabled only for the administrator
-
1 = enabled for the consolidator
-
2 = enabled for end user.
By default, access is granted to roles 0 and 1 (administrator and consolidator).
-
-
Consolidation update statistics: Updates database statistics after the consolidation process. This may slow consolidation slightly but improves performance for subsequent operation.
-
Lock period during conso: Locks period data while a consolidation job is running. Users cannot enter or edit data until the consolidation is complete.
-
Bundle exclude equity: If selected, intercompany transactions consolidated using the equity method will be excluded from offline bundles.
-
Disable use of the proportional method: Enabling this option disables the use of the proportional method in IFRS GAAP. The Proportional method option will not be available in the Consolidation method drop-down list when defining the company on the
Group > Companies page. -
Input view all shares: Displays all shares on the
 Data Entry > Data Entry > Participation page, rather than limiting it to shares declared in the portfolio.
 -
Include only Approved user journals: Ensures that consolidation only includes those user-created journals that have been approved.
-
Allow Others and Quantities account types in the T081 elimination: Include Others and Quantities account types in the T081 elimination process during consolidation.
Advanced
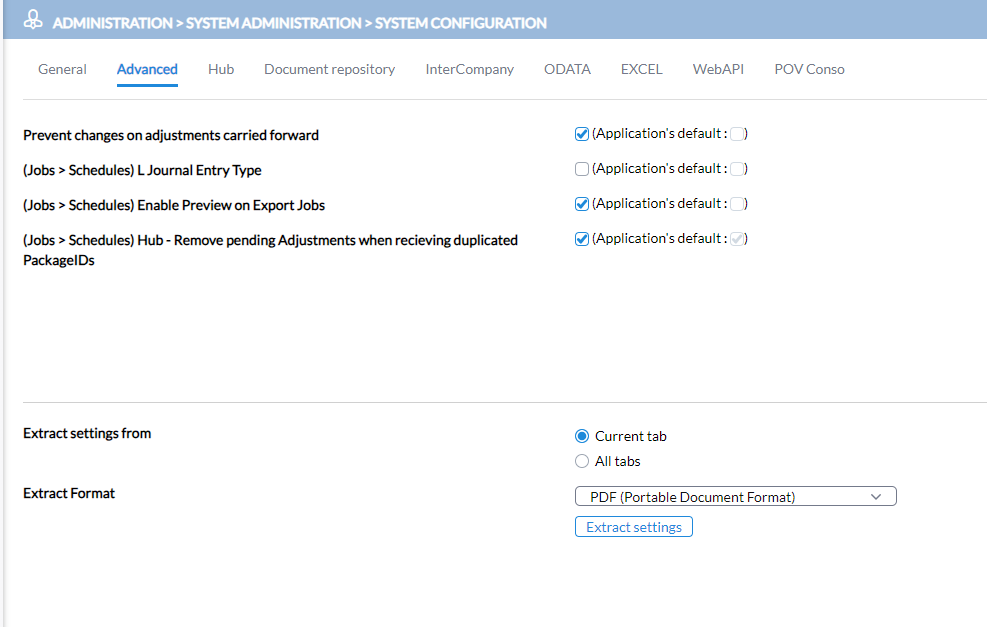
This page contains the advanced settings for the application.
-
Prevent changes of adjustments carried forward: Prevents users from editing or deleting adjustments that have been carried forward from a previous period. When enabled, any attempt to edit a carried-forward adjustment is blocked. When importing, an error is generated if the imported file contains a journal entry that matches an existing carried-forward adjustment in the current period.
-
Move all carried forward journal from main to subgroup: When enabled, moves all carried-forward journals from the main group to the subgroup during consolidation, including when the main and subgroup use different currencies. By default, this option is disabled, which preserves the behavior introduced in the 2025.2 release that blocked journal transfers across different currencies.
-
(Job > Schedules) L Journal Entry Type: Controls the source data used when exporting Local Data as part of the Export to Reporting Solutions job. By default, the application uses Local Data. Select this option to use Locally Adjusted Data instead.
-
(Job > Schedules) Enable Preview on Export Jobs: :Displays a preview of limited data that will be included in the export.
To extract system settings from the tab, see Export system settings.
Hub
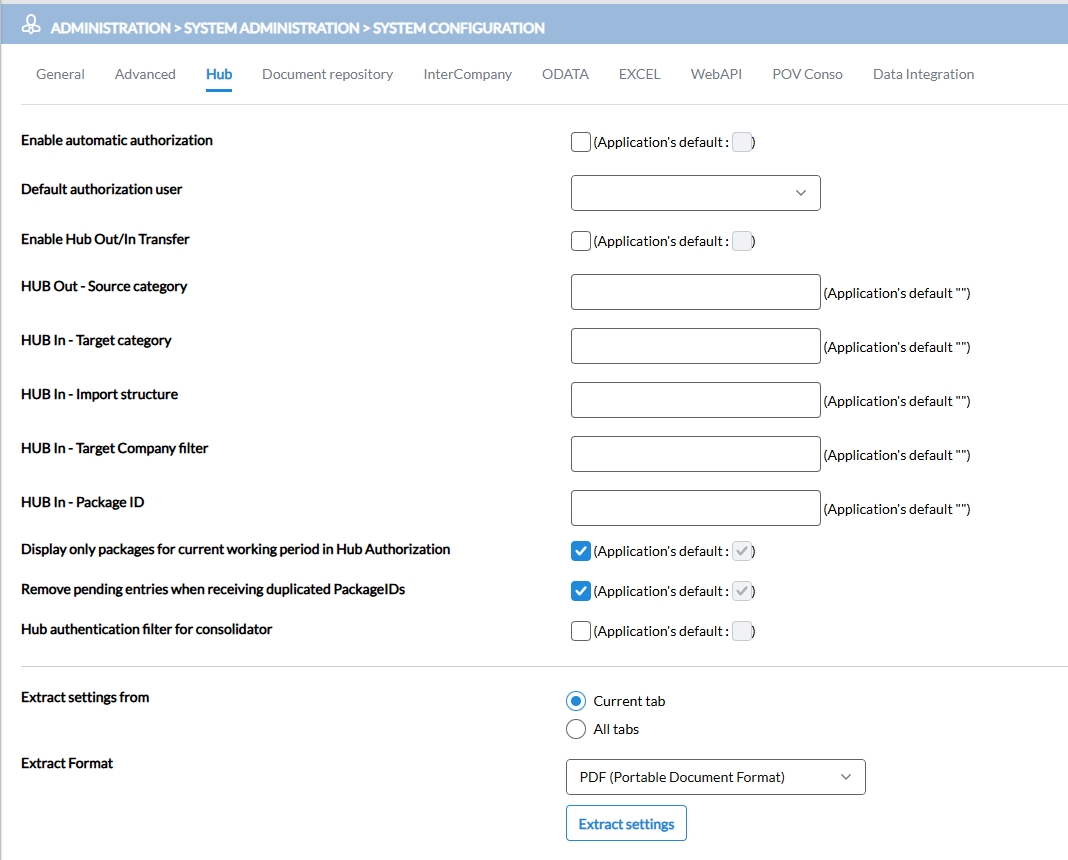
The Hub tab contains settings for managing import authorization in the HUB.
-
Enable automatic authorizationAutomatically authorizes packages in the HUB without requiring user acceptance. Data is processed and imported as soon as it arrives in the HUB.
-
Default authorization user: The user account assigned to authorize packages by default when automatic authorization is not enabled.
-
Enable Hub Out/In Transfer: Allows the HUB to transfer data between categories. Commonly used during sub-consolidation.
-
HUB Out - Source category: The category from which data is extracted and sent out through the HUB (the "sending" side of the transfer)
-
HUB In - Target category: The category into which the incoming data is imported (the "receiving" side of the transfer).
-
HUB In- Import Structure: The file or data structure definition that tells the HUB how to interpret and map the incoming data on import, similar to how import rules define field mapping in the application.
-
HUB In - Target Company filter: Filters import to the specific company that is the destination for the incoming data.
-
HUB In- Package ID: The name assigned to the package as it appears at the top of the Hub Authorization page.
-
Display only packages for current working period in Hub Authorization: Limits the packages shown in Hub Authorization to those associated with the current working period.
-
Remove pending entries when receiving duplicated PackageIDs: Prevents duplicate entries from accumulating on the Hub Authorization page. When enabled (default), the system checks for a pending entry with the same package ID before creating a new one. If a match is found, the pending entry is removed and a new one is created. If no match is found, a new entry is created. When disabled, both the canceled entry and the new entry remain visible.
Document repository
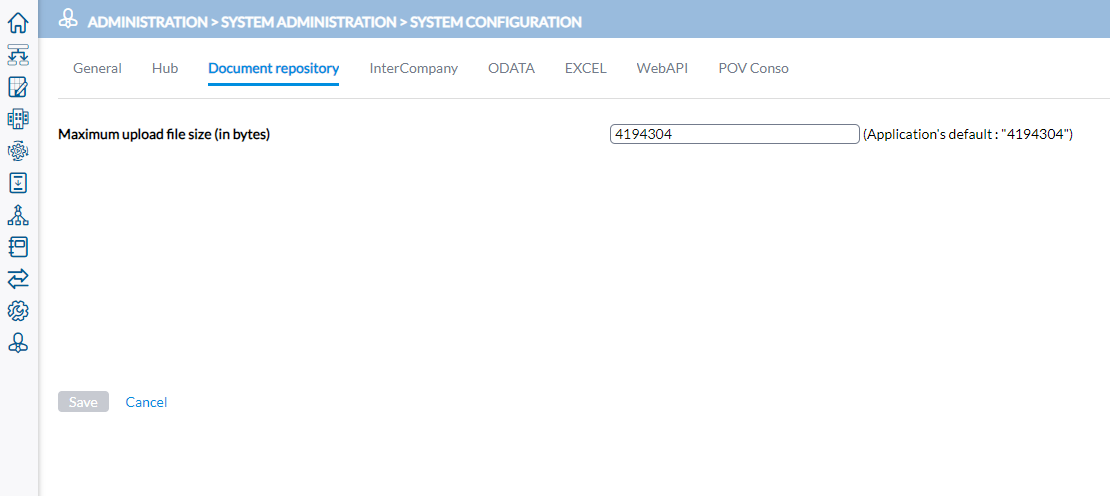
Use this tab to set the maximum file size allowed for document uploads. The default is 4194304 bytes (4 MB)..
In the Maximum upload file size (in bytes) field, specify the maximum size allowed for file uploads.
Intercompany
Use this tab to configure the connection between Financial Consolidation and the Intercompany Management application.
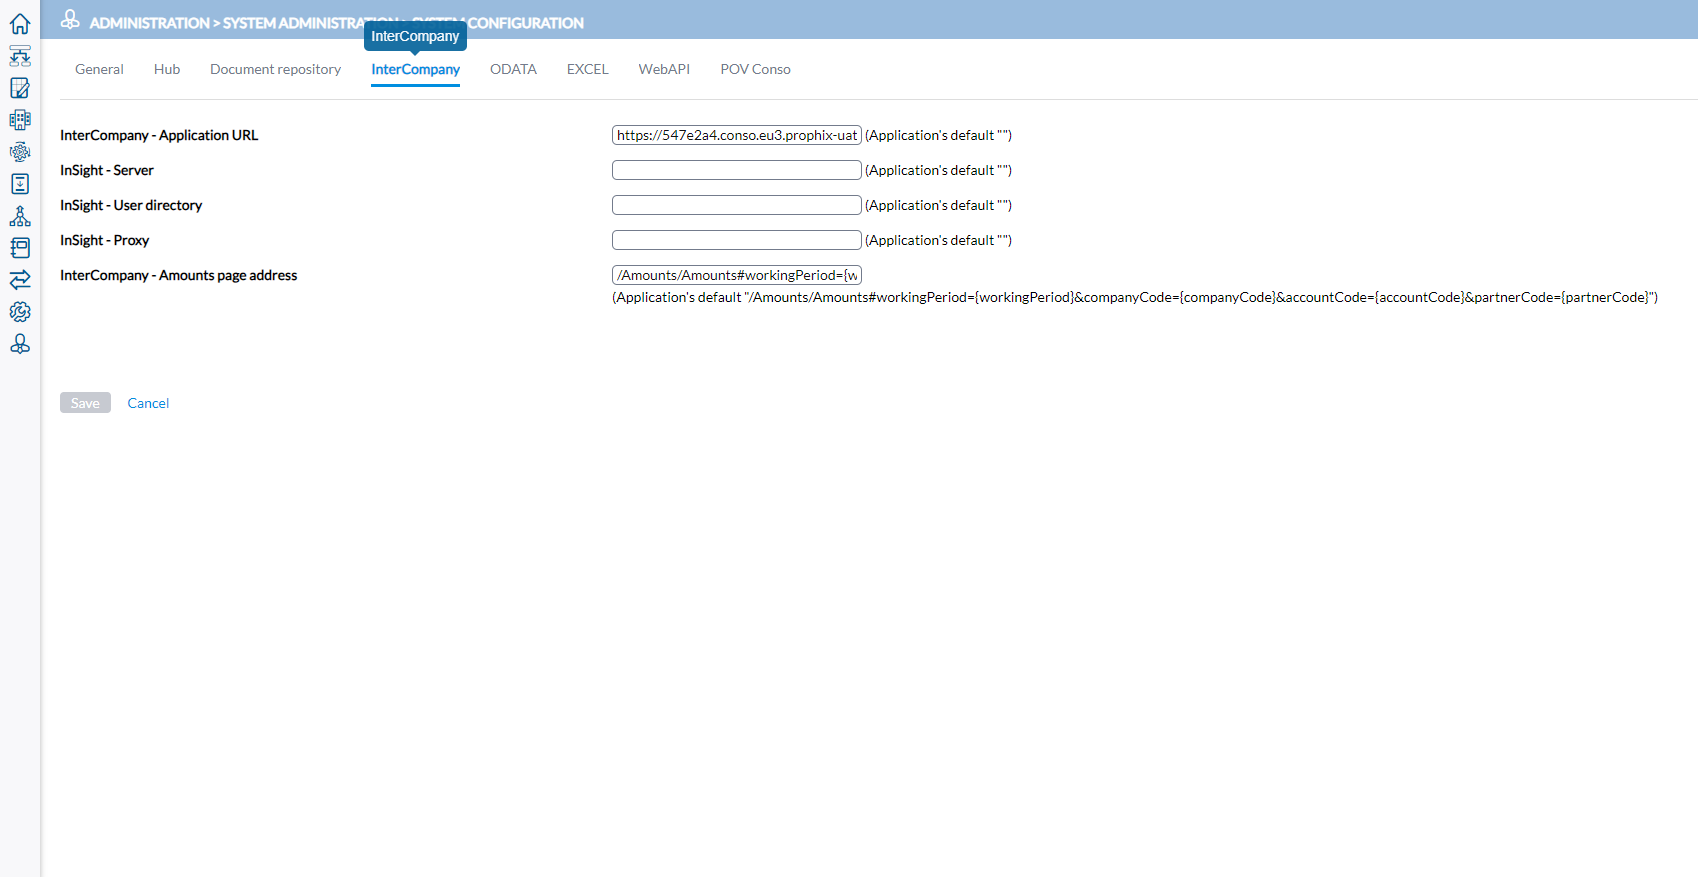
Note: Ignore any references to 'Insight' — these are no longer relevant to Intercompany configuration..
-
InterCompany - Application URL: The URL of the Intercompany Management application.
-
InterCompany- Amounts page address: The URL of the Intercompany page that opens when a user clicks the View link from Financial Consolidation.
OData
Use this tab to configure OData connections for the application.
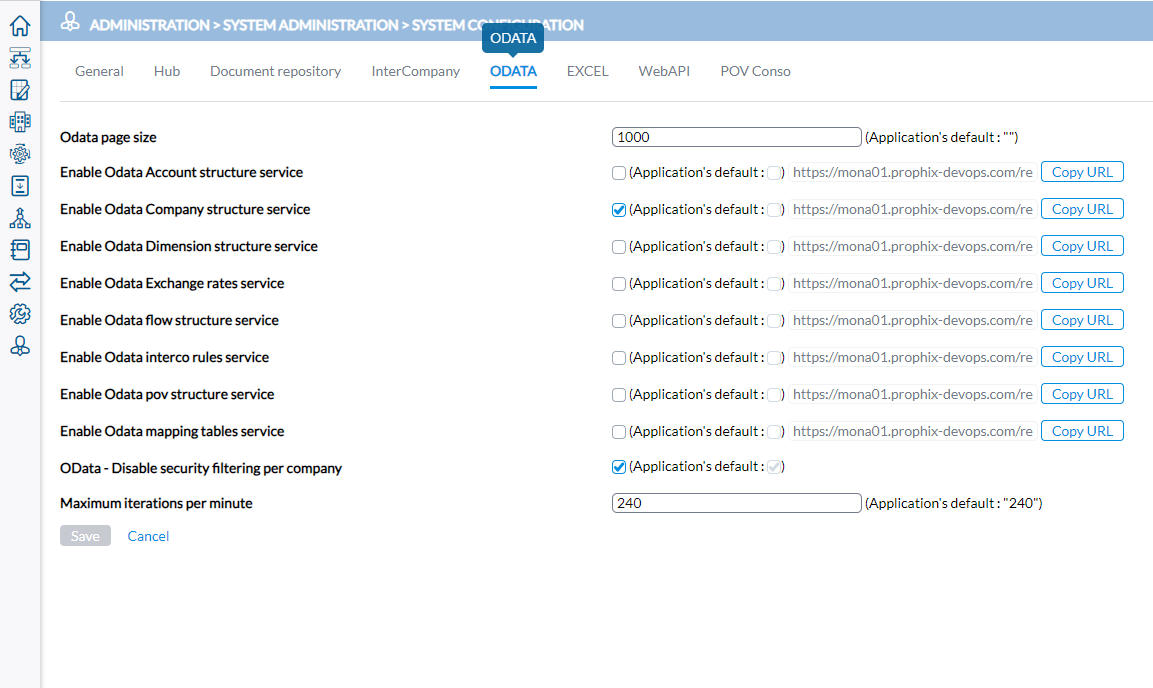
Odata page size: Sets the number of lines returned per page in OData responses. Use the smallest value that meets your needs to optimize performance
The following endpoints can be enabled or disabled in the application. By default, these endpoints are disabled. To activate them, enable as necessary:
-
Enable Odata Account structure service
-
Enable Odata Company structure service
-
Enable Odata Dimension structure service
-
Enable Odata Exchange rates service
-
Enable Odata Flow structure service
-
Enable Odata Interco rules service
-
Enable Odata POV structure service
-
Enable Odata Mapping Tables service
OData - Disable security filtering per company: By default, users can only retrieve data for companies they are authorized to access. Enabling this option removes that restriction, granting all users access to all company data across all OData endpoints.
Maximum iterations per minute: Sets the maximum number of OData requests allowed per minute from external systems. Requests that exceed this limit will receive an error response from the application.
Excel
Excel add-ins are additional software components that seamlessly integrate with Microsoft Excel, enhancing it with specific features and functionality beyond those included in the standard Excel package. For more information, refer to Excel Add-in Formulas for Financial Consolidation.
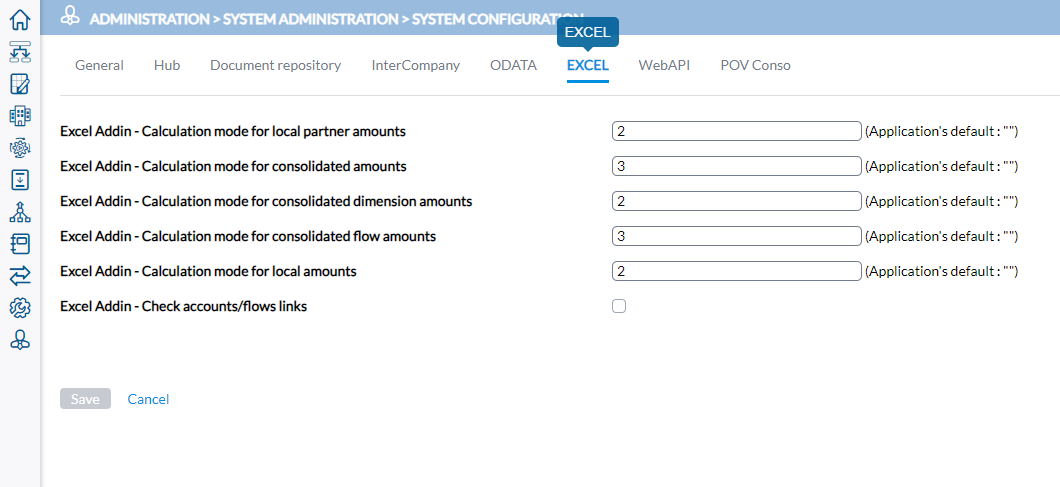
Calculation Mode 1 is the default. It retrieves data directly from the fact table. Modes 2 and 3 use temporary tables and sub-queries for different processing methods. You can change the mode for each of the following data types if needed.
-
Excel Addin - Calculation mode for local partner amounts
-
Excel Addin - Calculation mode for consolidated amounts
-
Excel Addin - Calculation mode for consolidated dimension amounts
-
Excel Addin - Calculation mode for consolidated flows
-
Excel Addin - Calculation mode for local amounts
Note: Unless advised by your consultant, leave these settings at the default (Mode 1)
-
Excel Addin - Check accounts/flows link: Verifies the association between accounts and flows as defined at
Configuration > System Structures > Flows > Accounts X Flows. If no flow code is linked to an account, an error message is displayed instead of a value of 0.
To extract system settings from the tab, see Export system settings.
WebAPI
This feature is deprecated and no longer in use. No configuration is required
POV Conso
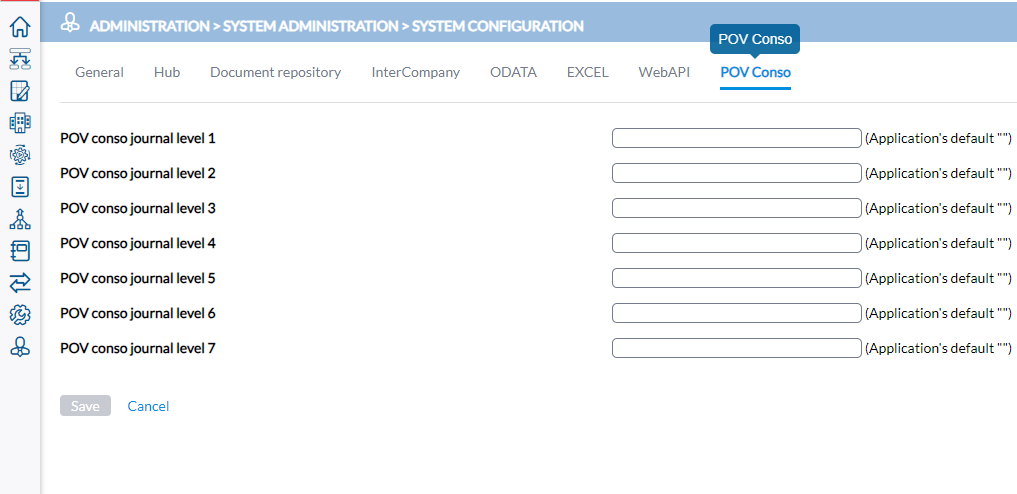
Use this tab to define the different journals that are used for Point of View
To extract system settings from the tab, see Export system settings.
Data Integration
Use this tab to control which roles have access to Data Integration (DI) functionality.
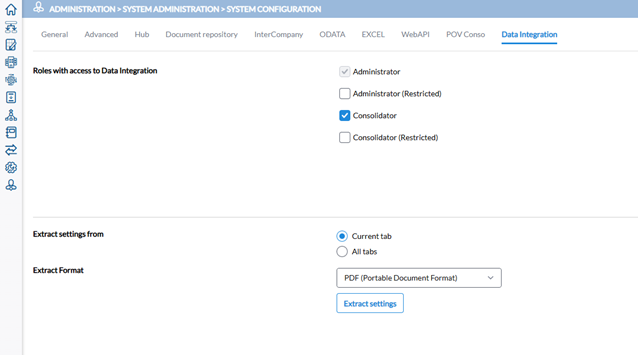
Roles with access to Data Integration:
-
Administrator — selected by default. This cannot be changed; the Administrator role always retains access to Data Integration.
-
Administrator (Restricted) — cleared by default.
-
Consolidator — selected by default but can be cleared if desired.
-
Consolidator (Restricted) — cleared by default.
To extract system settings from the tab, see Export system settings.
Export system settings
Use this option to export system settings for comparison, validation, configuration duplication, or archiving.
Administrators have the options to:
-
extract settings from either the current tab or from all tabs.
-
export to either a PDF or an Excel file.
To extract system settings, go to the bottom of the page.
-
In the Extract settings from field, choose to either select settings from the Current tab or All tabs.
-
In the Extract Format field, choose a file format for the export.
-
Click
 .
.
Update the system settings
Caution: Do not update this page without first seeking advice from your consultant.
-
Click on the tab containing the settings you want to configure.
-
Modify the settings.
-
Click
 .
.